You can create invoices and email them to payers. You can either create an invoice each day/week/month, or you can create recurring invoices. In this article, we discuss how to create a single invoice. For more information about creating recurring invoices, see Create a Recurring Invoice.
Creating Invoices
When creating invoices, you can invoice siblings at the same time, and you have the option to invoice withdrawn children.
- From the menu to the left, click Accounting.
- Click Income.
- Enter your Accounting PIN and click Go.
Note: If you do not have an Accounting PIN set, you are prompted to set one.
- Click Add Invoice. The New Invoice page opens.
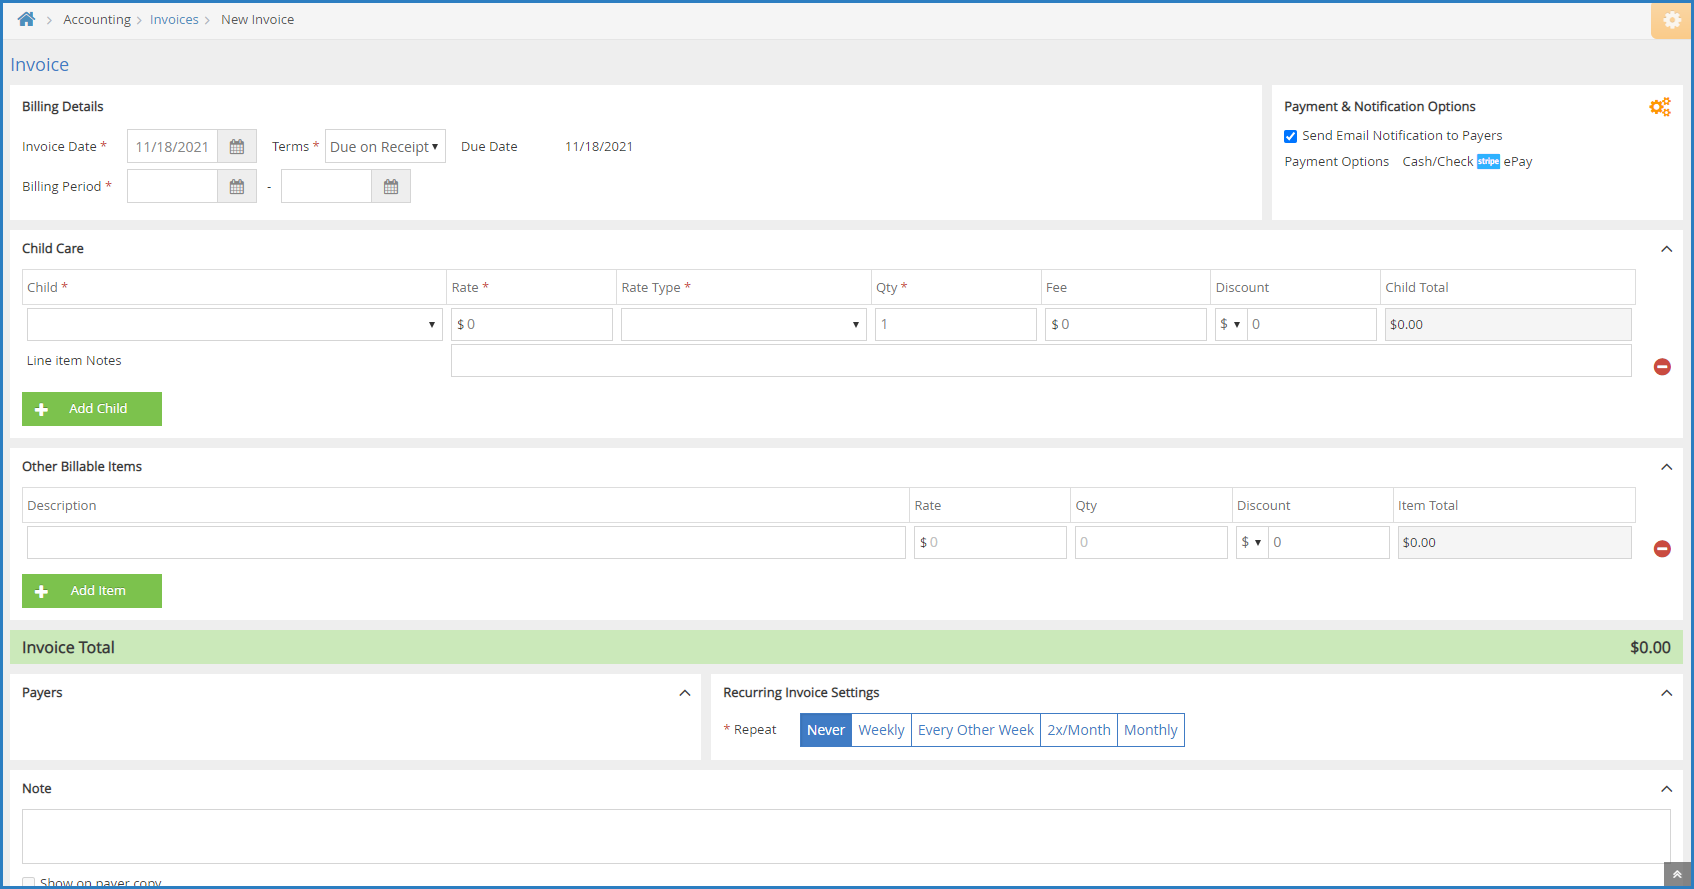
- In the Billing Details section:
- Click the Invoice Date box and select the invoice date from the calendar. This defaults to today's date.
- Click the Terms drop-down menu and choose from the following:
- Due on Receipt
- Due in 7 Days
- Due in 15 Days
- Due in 30 Days
- Custom
- If you selected Custom in Step 5b, click the Due box and enter the number of days from the invoice date that this invoice is due. The Due Date field to the right updates automatically.
- Click the Billing Period boxes and set the first and last day of the billing period for this invoice.
- In the Payment & Notification Options section:
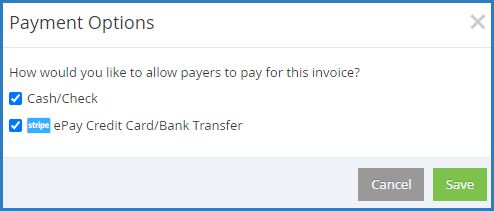
- Click
 . The Payment Options dialog box opens.

- Check the box next to each payment method to allow for this invoice.
- Click Save. The Payment Options dialog box closes.
- Check the Send Email Notification to Payers box to send an email to payers once this invoice is completed.
- Click
- In the Participant Care section:
- Click the Participant drop-down menu and select the participant to add to this invoice. If there is a default rate set on the participant's account, the Rate and Rate Type boxes populate automatically.
Note: If you need to create an invoice for a Pending participant, click Filters in the top-right corner, and select Pending. This will include Pending participants in the Participant drop-down menu.
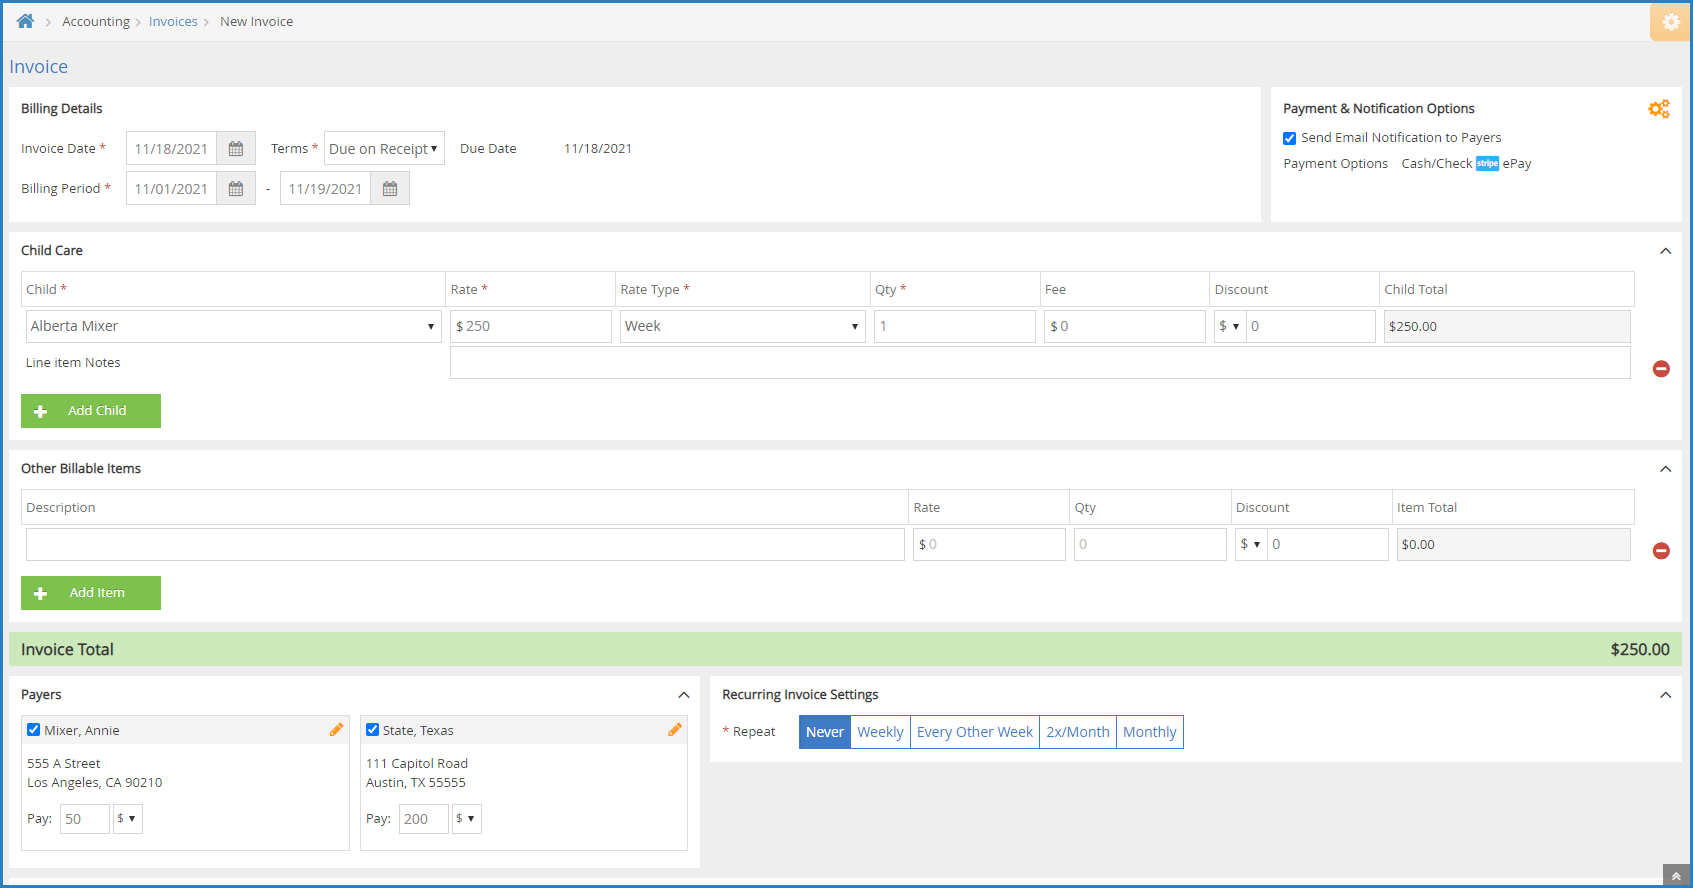
- Click the Rate box and enter the base rate to charge for this participant.
- Click the Rate Type drop-down menu and choose from the following:
- Hour
- Half Day
- Day
- Week
- Two Weeks
- Month
- Attendance
- Click the Qty box and enter the number of units charged. For example, if you selected Day in Step 6c, this would be the number of days for which you are charging.
- Click the Fee box and enter any additional fees charged.
- Click the Discount box and enter any discounts that apply. This can be a dollar amount or percentage. To change it, click the $ drop-down menu and select %.
- Click the Line Item Notes box and enter any notes about the charges.
- To add another participant to the invoice, click Add Participant and repeat Steps 6a-6g. Participants must be set up as siblings before you can add them to the same invoice.
- Click the Participant drop-down menu and select the participant to add to this invoice. If there is a default rate set on the participant's account, the Rate and Rate Type boxes populate automatically.
- In the Other Billable Items section:
- Click Description box and enter a description of the billable item. For example, you may be charging for diapers.
- Click the Rate box and enter the rate charged for this time.
- Click the Qty box and enter the amount of this item to bill.
- Click the Discount box and enter any discounts that apply. This can be a dollar amount or percentage. To change it, click the $ drop-down menu and select %.
- Click Add Item and repeat Steps 7a - 7d for each billable item to add.
- In the Payers section, check the box next to each payer who should receive this invoice.
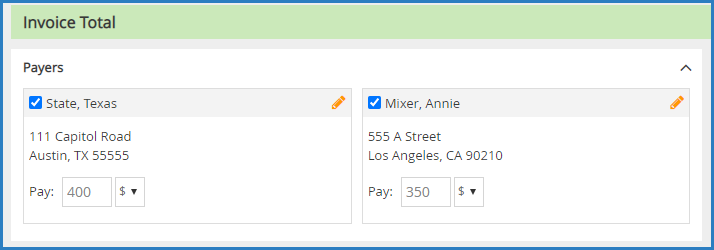
- If a payer has an account credit, click
 next to the credit to apply it to this invoice.
 - Click the Note box and enter any notes about this invoice. To show this note on the payer's copy, check the Show on Payer Copy box.
- Choose from the following options:
- Click Save as Draft to save this invoice as a draft and return to working on it later.
- Click Preview to preview the invoice. If you checked the Send Email Notification to Payers box in Step 6d, you can customize the email the payer receives before sending the invoice.
- Click Create Invoice to create the invoice without previewing it. The invoice is created at Unpaid status and you are returned to the invoices list. If you checked the Send Email Notification to Payers box in Step 6d, the invoice is sent to the payer.


 next to the credit to apply it to this invoice.
Once you create or create and send an invoice, it moves from Draft status to Unpaid status. Once the guardian makes a payment, you can record a payment to the invoice. For more information, see Record Invoice Payments.