
KidKare Accounting for Homes and Centers both come with several default email templates used when you email invoices to payers and designate guardians as payers. If you also use ePay, payers receive emails when payment is declined and when you make changes to recurring invoices. Personalize these emails to fit your business and branding needs. You can also enable and disable them.
Edit Accounting Email Templates
Customize email templates to fit your business and branding needs.
- From the menu to the left, click Accounting.
- Click Settings. The Site Level Settings page opens.
- Click the template to update. For example, to customize the invoice email template, you would click Default Invoice Template. The Email Template pop-up opens.
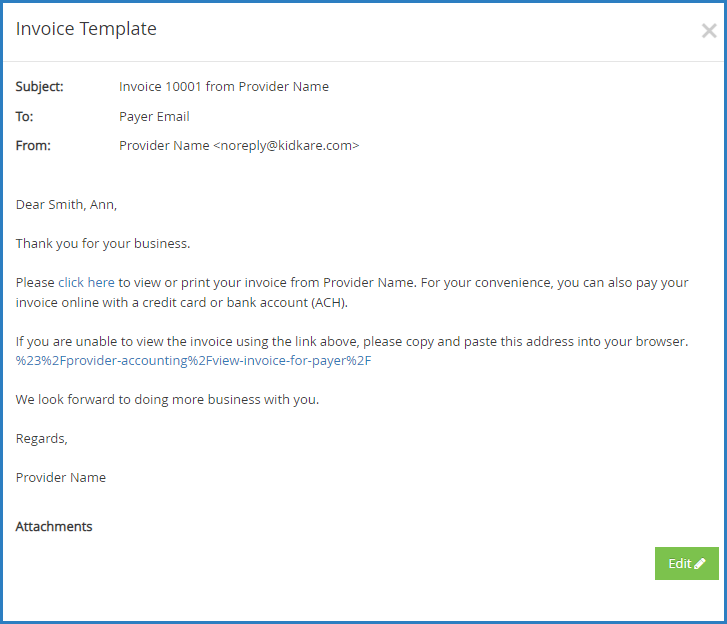
- Click Edit.
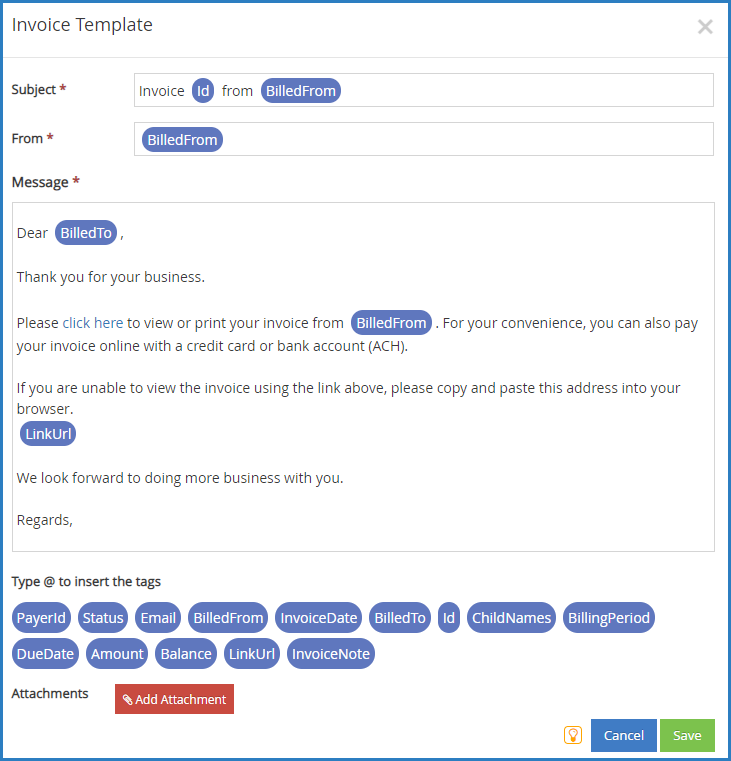
- Update the Subject, From, and Message boxes, as needed. Variables you can use to fill-in certain information are listed at the bottom of the editor (#Payerid, #Email, #id, and so on). To add one of these variables to your text, type @ and begin typing the variable to use. A list of available items displays as you type, so you can select the variable you need. For example, to populate the Subject with the recipient's invoice number, you would type @InvoiceNumber in the Subject box.
- To add an attachment:
- Click Add Attachment.
- Click Choose.
File Type & Size Limits: You can attach the following file types: .JPG, .JPEG, .PNG, .DOC, .DOCX, .XLS, .XLSX, .PPT, .PPTX, and .PDF. The maximum file size for an individual file is 10MB, and the total size for all attachments is 25MB.
- Browse to the attachment on your computer, and click Open.
- When finished, click Save.


Enable & Disable Accounting Email Templates
You can enable and disable email templates you do not wish to use. For example, if you do not plan on emailing invoices to parents, you could disable the Default Invoice Template.
- From the menu to the left, click Accounting.
- Click Settings. The Site Level Settings page opens. If an invoice is enabled, the slider is green. If the invoice is currently disabled, the slider is red.
- Click
 to enable the template.
 - Click
 to disable the template.


Your changes are saved automatically on this page.