
To view a list of all your participants click My Children from the menu on the left. From here, you can use the filter and search options to find and organize children easily. Filter options include searching active/inactive children as well as searching by age. If you search by age, it will show all children the age you selected and younger. 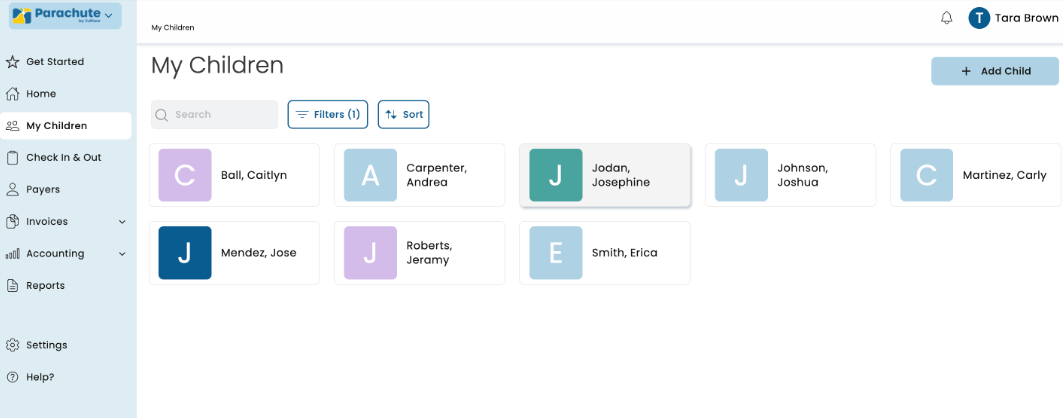
Add Children
Adding children to Parachute is fast and simple. Store as much or as little data as you need. If you are using a KidKare Food Program account you can onboard children unaffiliated with the Food Program to Parachute as well. To onboard children:
- From the menu to the left, click My Children.
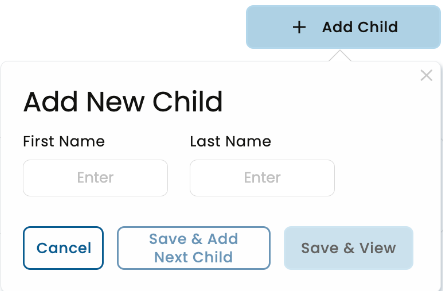
- Click + Add Child in the top right corner of the screen.
- Enter First and Last Name.
- Click one of the Save options.
- Save & Add Next Child: Use this to add multiple children quickly.
- Save & View: This allows you to edit the child's profile.

Add Children to KidKare Food Program
If you are using the KidKare Food Program in addition to Parachute, you can add a child to your Food Program account after they have been added to Parachute.
- From the My Children screen, click on the name of the child you are adding to the Food Program.
- Click the
 button in the top right corner.
 - Under the child name, toggle Is this child affiliated with the Food Program to Yes.
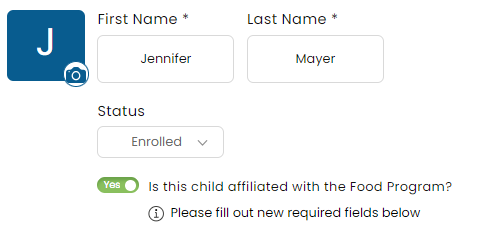
- Once toggled to Yes, new required fields will show in red. Fill out all required fields and click Save in the top right corner. If the Save button is greyed out, this means there are still required fields that need to be filled out. Make sure to check both the General and School & CACFP tabs in the child profile before you save.
 Once Saved, the child will show up in your KidKare Food Program account for you to start marking meals and attendance.
 button in the top right corner.
 Once Saved, the child will show up in your KidKare Food Program account for you to start marking meals and attendance.
 Note: Children will show up as Pending or Active depending on Sponsor settings.
Add Child Photo to Profile
- From the My Children screen, click on the name of the child you are adding a photo for.
- Click the
 icon next to the child name to add a photo.
 - Select the photo to add from your files/gallery on your device and click Open.
- The child photo loads into the child profile.
- To delete the photo, click Delete under the image and it will be removed and set back to the default.

 icon next to the child name to add a photo.
Update Child Status
- From the My Children screen, click on the name of the child you are updating status for.
- Click the
 button in the top right corner.
 - The Status option appears underneath the child name.
- Here, you have the option to set the status to Enrolled or Inactive.
- Click Save.
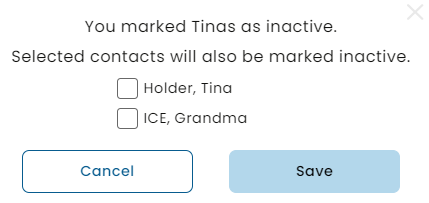
- If a child status is changed to Inactive, a pop-up appears asking if the contacts should be marked as inactive as well. Choose any contacts that should be marked as inactive and click Save.
 button in the top right corner.
View and Edit Child Profile
- From the My Children screen, click on the name of the child you are needing to edit.
- Click the button in the top right corner.
- Edit any information that needs to be updated.
- Click Save in the top right corner.
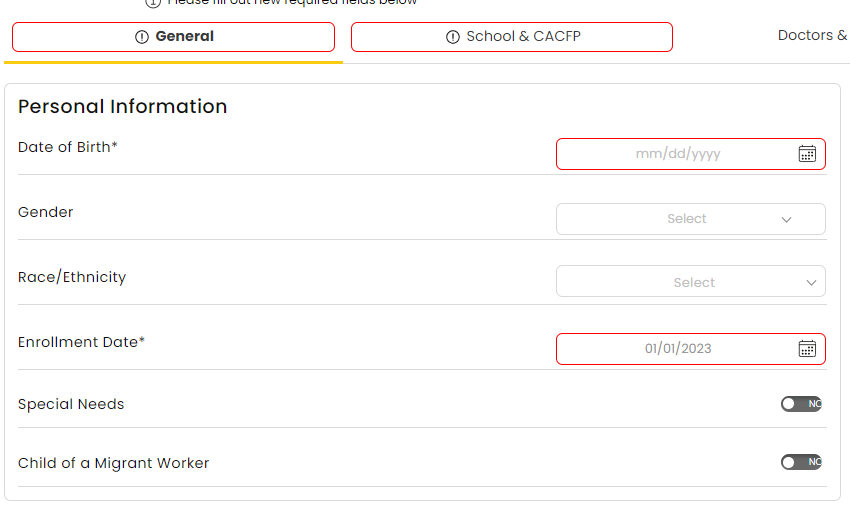
General Information
- Personal Information
- Date of Birth: Select date on calendar or enter in MM/DD/YYYY.
- Gender
- Race/Ethnicity
- Enrollment Date: The date they started in your program.
- Special Needs: Select whether the child has any special needs or not.
- Child of a Migrant Worker: This information may be necessary for different grant or subsidy programs.
- Parent/Guardian
- A quick view of all associated Parent/Guardian names, contact information and notes.
- The Checkmark Icon indicates authorized to pick child up.
- The X Icon indicated they are not authorized to pick child up.
- Click the + Iconto add either:
- An Existing Guardian: If the Guardian has already been onboarded click on their name in the Associated Guardian dropdown.
- A New Guardian: Quickly onboard a new Guardian by filling out the required fields. You can also add other associated children to this payer by selecting the appropriate child from the Associated Child dropdown.
- Agency
- A quick view of all associated Agency information.
- Click the + Icon to add either:
- An Existing Agency: If the Agency has already been onboarded click on their name in the Associated Agency dropdown.
- A New Agency: Quickly onboard a new Agency by filling out the required fields. You can also add other associated children to this payer by selecting the appropriate child from the Associated Child dropdown.
School & CACFP
- Child Care Attendance
- Meals: Select all meals the child is enrolled to attend.
- Will Pick up/Drop off times vary?
- Will days vary weekly?
- Overnight Child?
- Days in Care: Select all that apply based on child enrollment form.
- CACFP
- Enrolled in CACFP: Select Yes if this child is enrolled and participating in the CACFP (food program).
- School Details(for school-aged children):
- School Name: Enter School Name.
- District: Select applicable school district.
- Grade/Level
- Depart Time: Select time child is expected to leave for school.
- Return Time: Select time child is expected return from school.
- Days in School: Select all that apply.
Doctors & Insurance
- Doctors
- Name: Enter name of Doctor.
- Practice Type: Select what type of doctor they are.
- Clinic Name: Enter in name of Practice.
- Phone Number: Doctor's phone number.
- Address: Address of the Clinic and any special notes for this doctor.
- Notes: Enter any notes that may be relevant.
- Click the
 button to add multiple doctors and doctors with different specialties.
- Insurance Information
- Primary Account Holder: Name of the person on the insurance card.
- Insurance Name: Name of the insurance company.
- ID Number: Found on the back of the insurance card.
- Group Number: Found on the back of the insurance card.
- Phone Number: Phone number to contact insurance company.
- Click
 to add additional insurance if child is covered by multiple plans.
 button to add multiple doctors and doctors with different specialties.
  to add additional insurance if child is covered by multiple plans.
Allergies & Immunizations
- Allergies/Conditions: Enter the name of the child allergy or condition. Use the Notes section to add additional details about the allergy or condition.
- Click
 to add additional allergies/conditions.
- Click
- Immunizations
- Record dates of all applicable immunizations.
 to add additional allergies/conditions.
Payments
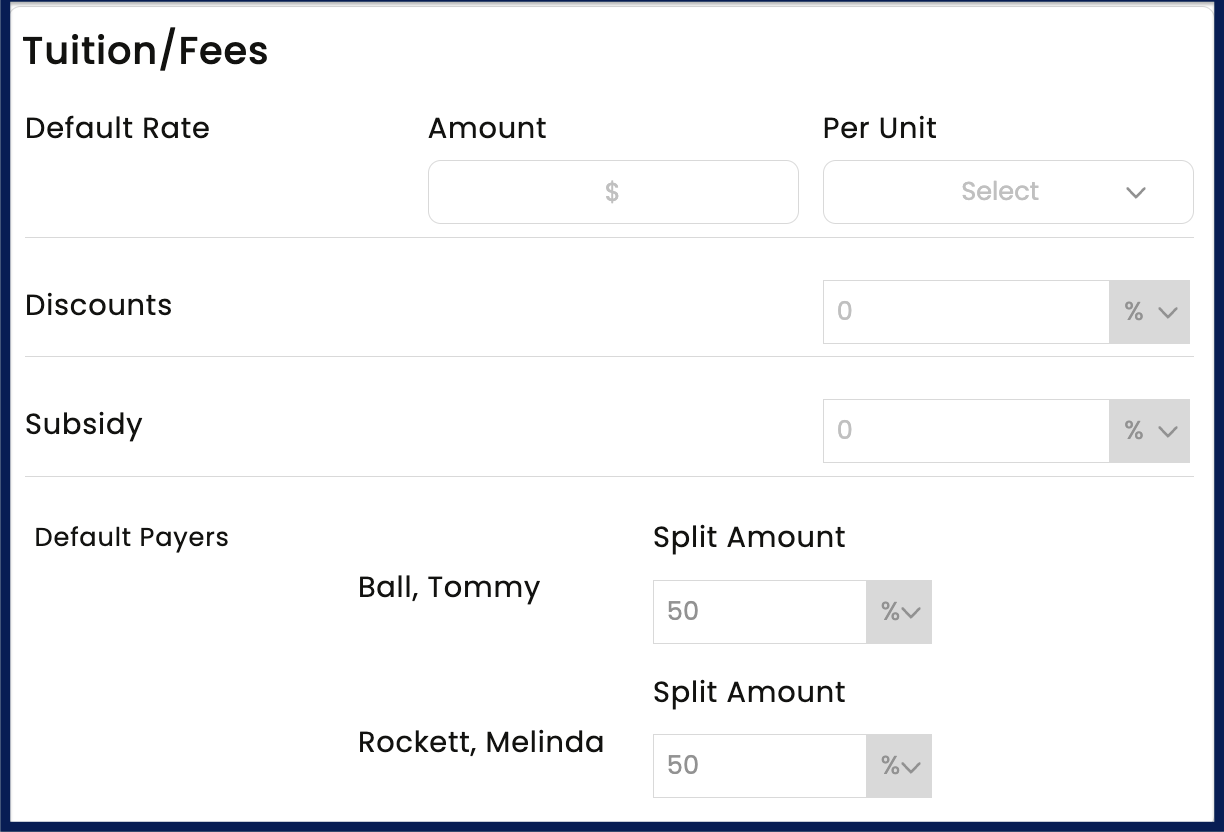
- Tuitions/Fees
- Default Rate: This is where you enter the default billing rate for the child. Use the fields below to set the default billing rate.
- Amount ($)
- Unit: This is where you select if the default rate is billed by the hour, week, month, etc.
- Discounts: Use this to indicate if the child receives an discounts in care, subtracts from the invoice total. Discounts can be entered as a dollar amount ($) or a percentage (%).
- Click the dropdown switch between $ and %.

- Click the dropdown switch between $ and %.
- Subsidy: Use this to indicate the child receives subsidized care billed on a different invoice our outside of Parachute, subtracts from the invoice total. Subsidies can be entered as a dollar amount ($) or a percentage (%).
- Click the dropdown switch between $ and %.

- Click the dropdown switch between $ and %.
- Default Rate: This is where you enter the default billing rate for the child. Use the fields below to set the default billing rate.


Note: Data entered into this section will be used to auto-populate rate and tuition fees when creating an invoice for this child
- Default Payers: Here you should see a list of all Payers associates with the child with Payer Permissions enabled
- If there are multiple payers you can add a default split by % or $.
- Click the down arrow icon to switch between % and $.
- If you split by $ you will be asked to select who should be charged if the Invoice total is larger than the amounts selected.
- If there are multiple payers you can add a default split by % or $.
