
After an invoice has been sent you are able to update an invoice status, edit invoice details, and more. Once an Invoice has been sent, you have the ability to comeback and mark it as paid, re-send it, clone it, and more. Review all action items for created invoices listed below:
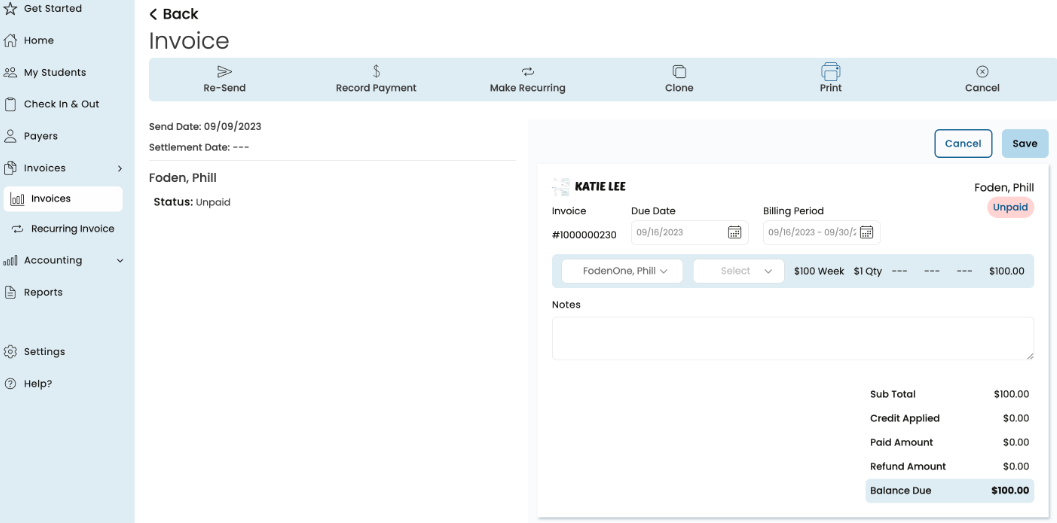
- Re-Send
- Click this to resend the Invoice to the payer(s) to their preferred notification method.
- Record Payment
- If you have received a payment for an Invoice using a payment method other than credit card or ACH you can record it by clicking this button.
- Payment Date: This is the date that you received the payment.
- Payer: If this invoice was split between multiple payers you can select the appropriate payer from the dropdown.
- Payment Method:
- Cash
- Check
- Other
- Payment Total: The amount paid with this payment method.
- + Add Payment Source: Click this if you received partial payments using different payment types.
- Notes: This is an internal note about the payment being recorded, payers will not see this note.
- Total Remaining: The total balance of the invoice that has not yet been paid.
- Payment Total: The amount of the payment being recorded.
- If you have received a payment for an Invoice using a payment method other than credit card or ACH you can record it by clicking this button.
- Make Recurring
Note: You can view all Recurring Invoices in the Recurring Invoice section.
- Clicking this will allow you to create a new recurring invoice with all of the same data automatically populated.
- Upon clicking the Make Recurring you will be directed to the Make Recurring Invoice Page, with all of the details of the original invoice auto-filled except for Due Date and Billing Period.
- To create a new recurring invoice you will have to enter in the First Due Date and Billing Frequency.
- Clicking this will allow you to create a new recurring invoice with all of the same data automatically populated.
- Clone
- Clicking this will allow you to create a new invoice with all of the same data automatically populated
- Upon clicking the Clone button you will be directed to a new Invoice Create page with all of the details of the original invoice auto-filled except for Due Date and Billing Period
- All fields on this page can be edited
- Clicking this will allow you to create a new invoice with all of the same data automatically populated
- Print: Click this to print the invoice
- Cancel: Click this to mark this Invoice as Canceled. This indicates you are not expecting a payment for this invoice
- Delete: Click this to delete this invoice, indicating that you do not wish payers to see this invoice anymore. This action cannot be undone
Edit Invoices
You can edit some fields of an Invoice after it has been sent. Editable fields are shown below:
- Due Date
- Billing Period
- Child Name
- Item Description
- Invoice Amount
- Notes
Note: If uneditable fields are incorrect cancel or delete the invoice before a payment is recorded.
- From the Invoices screen, click on the invoice that needs to be edited.
- The Invoice details open.
- Click
 in the top right corner.
 - Make the adjustments needed on this invoice.
- Click Save.
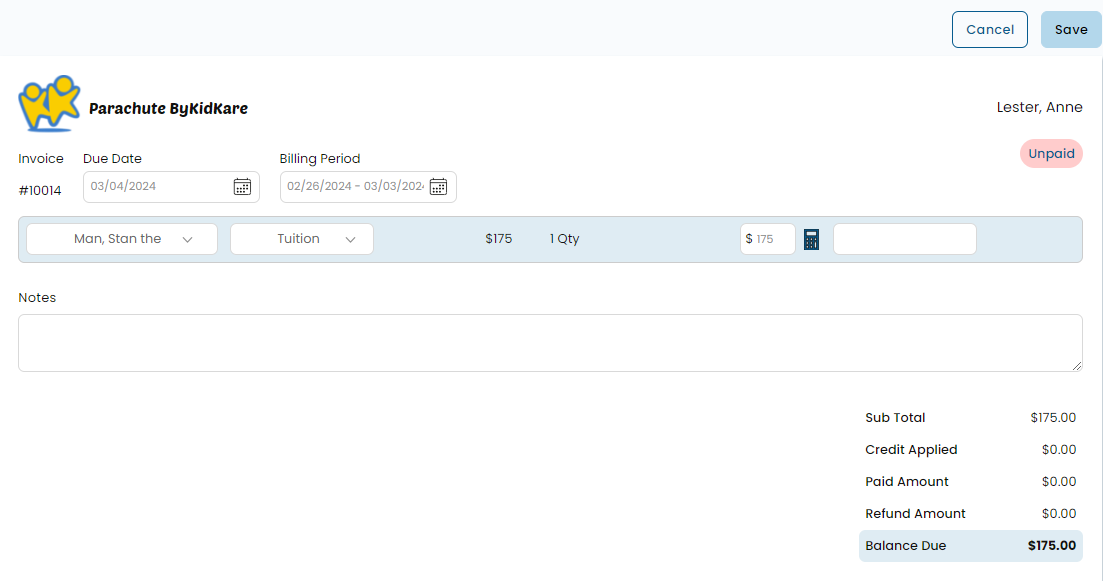
- The screen reloads with the updated information.
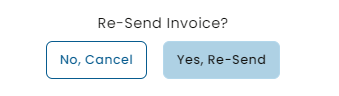
- If this invoice needs to be resent to the payer, click
 in the top left corner of the screen.
 - A confirmation pops up. Click Yes, Re-Send to resend the invoice. Click No, Cancel to go back to the in voice screen.
 in the top right corner.
 in the top left corner of the screen.
Record A Payment
- From the Invoices screen, click on the Invoice that needs to be marked as Paid.
- Click on
 in the options toward the top of the screen.
 - The Record Payment screen opens.
- Enter the required fields and add notes if necessary.
- If you received funds by multiple payment sources, click
 to add an additional source as shown below.
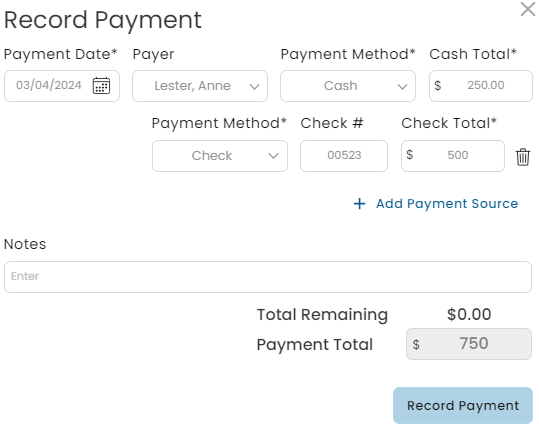
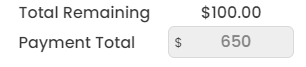
- If you enter payment but it does not cover the full balance, the remaining balance will show under Total Remaining and the invoice will be moved to Partially Paid status.
- Click Record Payment.
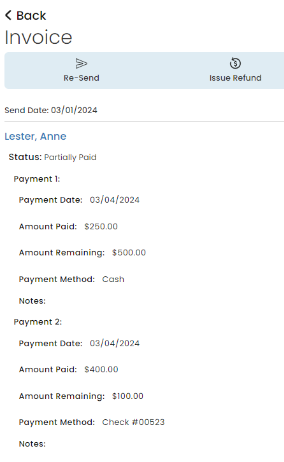
- All payment details will show on the left hand side of the in voice once payment is recorded.
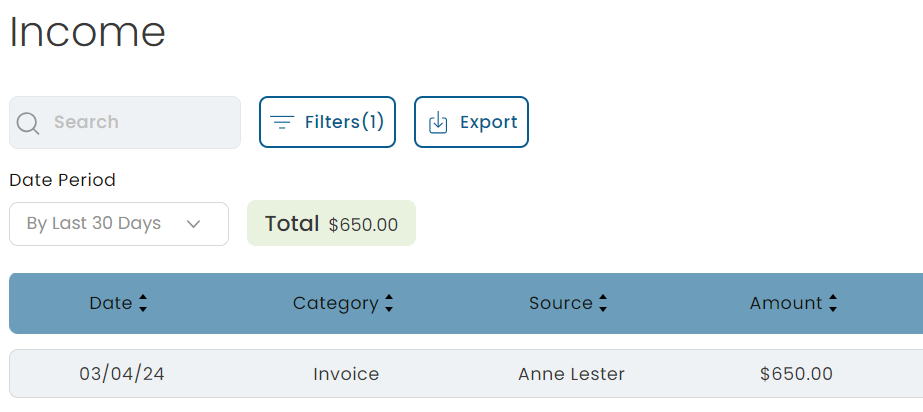
- Payments recorded will automatically show up as Income under the category Invoice.
 in the options toward the top of the screen.
 to add an additional source as shown below.


Issue Refund
After an Invoice has been marked Paid, either by manually recording a payment or automatically when a Payer pays with credit card or ACH, then you will see the option to Issue a Refund added to the options at the top of the screen. Click this to issue a refund.
Note: Before Issuing a refund to a Payer's original payment method make sure to confirm that the credit card or bank account associated with the payment is still active. If it is, not the Payer may not properly receive the funds for the refund and you will need to issue the refund using different payment method.
- From the Invoices screen, click on the Invoice that needs a refund issued.
- Click on
 in the options toward the top of the screen.
 - The Refund screen opens.
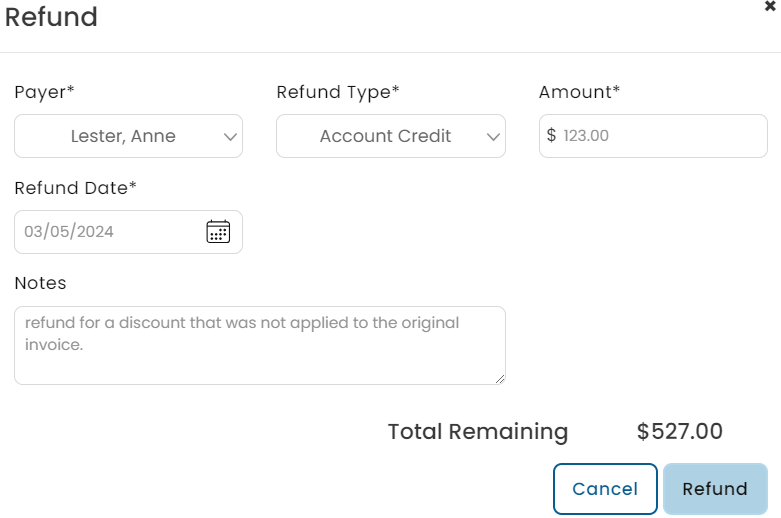
- Enter the required fields and add notes if necessary. Field definitions are below for you to reference:
- Payer: If multiple payers have paid their portion of the invoice you can select the appropriate payer from the dropdown.
- Refund Type: This indicates what payment method was used to refund the Payer. Account Credit is an option that will issue credit to the Payer's Parachute Account, which they can use to pay other invoices.
- Original Payment Method: This option is only available if the payment meets the following criteria:
- Originally paid with either a credit card or ACH.
- If the original payment was made with a credit or debit card less than 12 months ago.
- If the original payment was made with ACH less than 180 days ago.
- If this option is selected the refund will go directly to financial account associated with the Payers credit/debit card, or ACH account.
- Amount: Amount that should be refunded
- Refund Date: The date the refund was issued. If the refund is made to either credit card or ACH this will be auto-filled with today's date
- Notes: This will be an Internal note related to the refund
- Once all fields are completely filled out, click Refund.
 in the options toward the top of the screen.
Edit Manual Payments and Refunds
Recorded payments and refunds can be updated by clicking the Edit button next to the associated Payer's name and making adjustments as needed.
- From the Invoices screen, click on the Invoice that needs the payment or refund details edited.
- Click the
 button next to the Payer name.
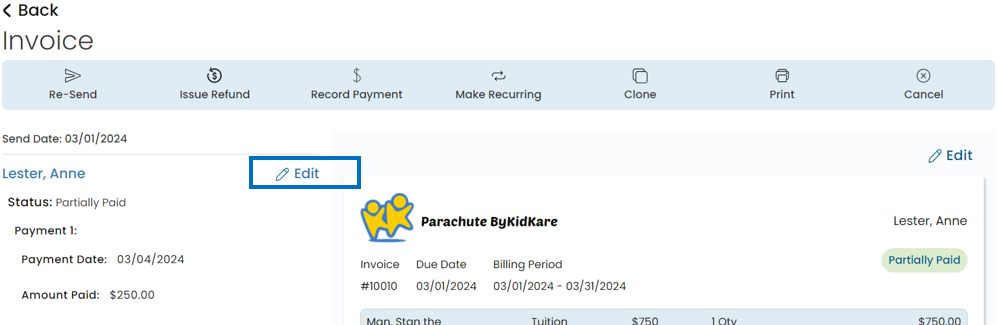
- The editable fields open up for you to make changes as seen in the image below for the refund.

- Update the appropriate fields.
- Click Save.
 button next to the Payer name.
