
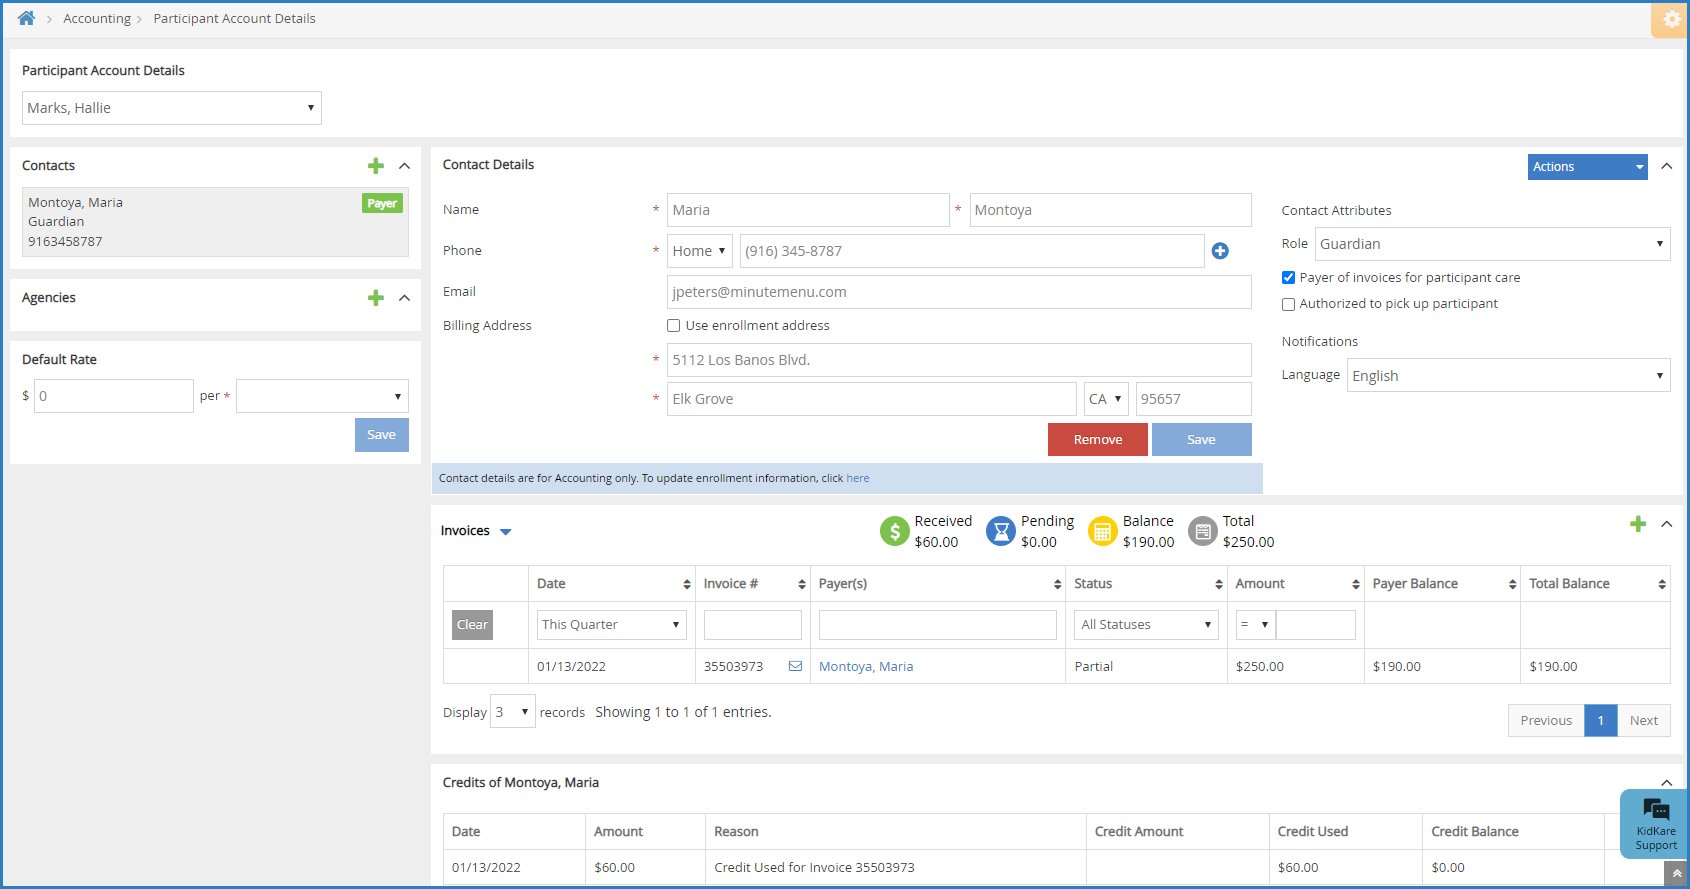
All contacts for a participant account can be found on the Participant Account Details page. Here, you can manage contact status, add contacts, and update contacts. Contacts can be at one of the following statuses:
- Payer: This contact can pay invoices.
- Other: This is a non-payer contact.
- Inactive: This contact is no longer a payer on the participant account.
Note: Contact details entered on the Participant Account Details page are for accounting purposes only. This information does not affect enrollment data. To update enrollment data, see Edit Participant Enrollment Information.
Click a link below to jump to a specific topic.
Add Contacts
Before you can create invoices for participants, you must first add accounting contacts to the participant account and designate at least one of them as a payer of invoices. This means that the contact can receive and pay invoices for the participant account. If you need to add an agency to a participant account, see Manage Agencies.
- From the menu to the left, click Accounting.
- Click Accounts. The Participant Account Details page opens and displays information for the last participant you viewed.
- Click the drop-down menu at the top of the page and select the participant for whom to add a contact.
Note: Click Filters to filter the participants included in the drop-down menu by Active, Pending, or Withdrawn status.
- Click
 in the Contacts section to the left.
 - In the Contact Details section:
Note: If this section does not display, click
 to expand it.
- Click Existing or New. If you select Existing, you can select a contact you've entered previously.
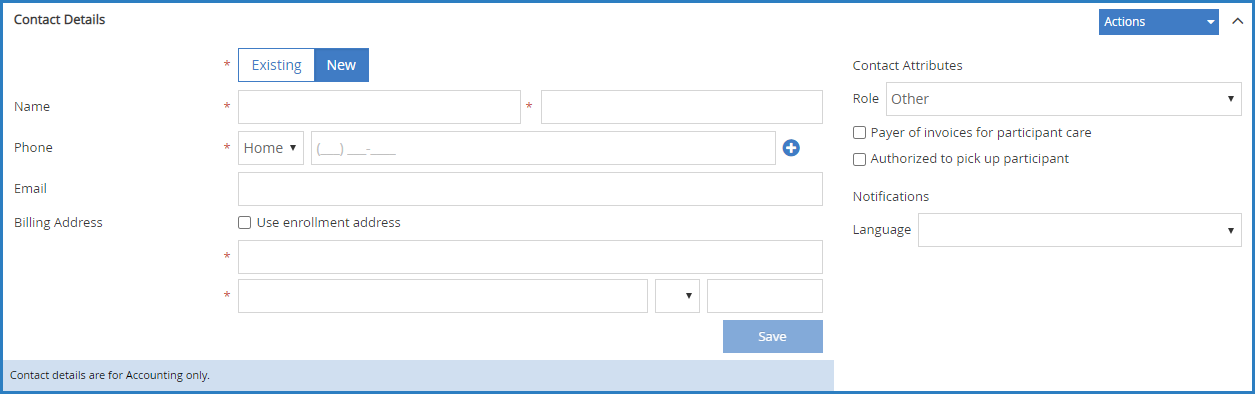
- Click the Name boxes and enter this contact's first and last name.
- Click the Phone drop-down menu and select Home, Mobile, or Work. Then, enter the phone number in the corresponding box. To add additional contact numbers, click
 .
. - Click the Email box and enter the contact's email address.
- Click the boxes in the Billing Address section and enter the contact's billing address. You can also check the Use Enrollment Address box to use the address stored in the participant's enrollment record.
- Click Existing or New. If you select Existing, you can select a contact you've entered previously.
- In the Contact Attributes section:
- Click the Role drop-down menu and select Guardian or Other.
- If this contact can pay invoices for the participant account, check the Payer of Invoices for Participant Care box.
Note: When you mark a contact as a Payer, you can specify the dollar amount or percentage they pay for care in the Payment Settings section of this page. For more information, see Manage Payment Settings.
- If this contact can pick the participant up from care, check the Authorized to Pick Up Participant box.
- In the Notifications section, set notification preferences for this participant.
- Click the Language drop-down menu and select English or Spanish.
- Select the notification type: Email or Text Message.
- Click Save.
- If this contact is a Payer, click the Actions drop-down menu and select Send Welcome Letter. The contact receives an email at the address you specified in Step 5d.
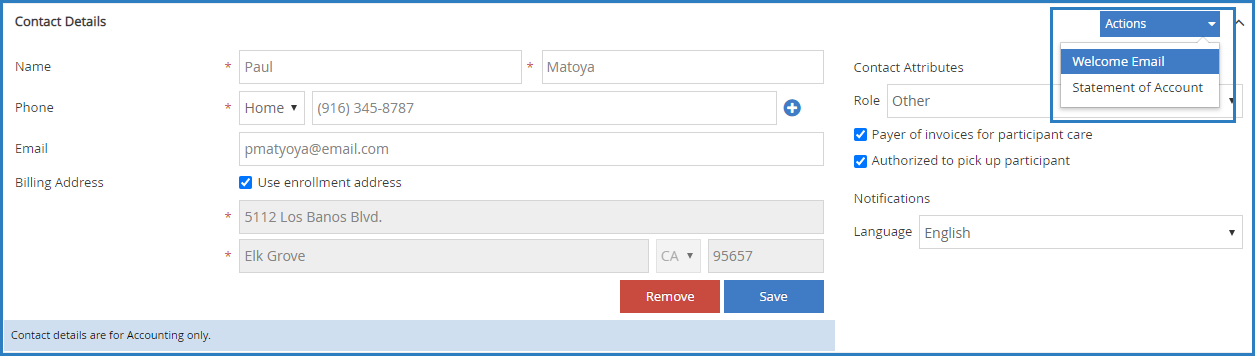


Note: You can customize the welcome letter contacts receive. For more information, see Customize Accounting Email Templates.
Edit Contacts
You can update contact details at any time. Remember, adding or updating contacts on the Participant Account Details page only updates accounting information for that contact. Enrollment information is not affected.
- From the menu to the left, click Accounting.
- Click Accounts. The Participant Account Details page opens. The Participant Account Details page opens and displays information for the last participant you viewed.
- Click the drop-down menu at the top of the page and select the participant for whom to manage contacts.
- From the Contacts section to the left, click the contact to change. The Contact Details section displays the current information for this contact.
Note: If this section does not display, click
 to expand it.
 - Click each box in the Contact Details section, and enter new information over the existing information.
- Update your selections in the Contact Attributes section, as needed.
- When finished, click Save.

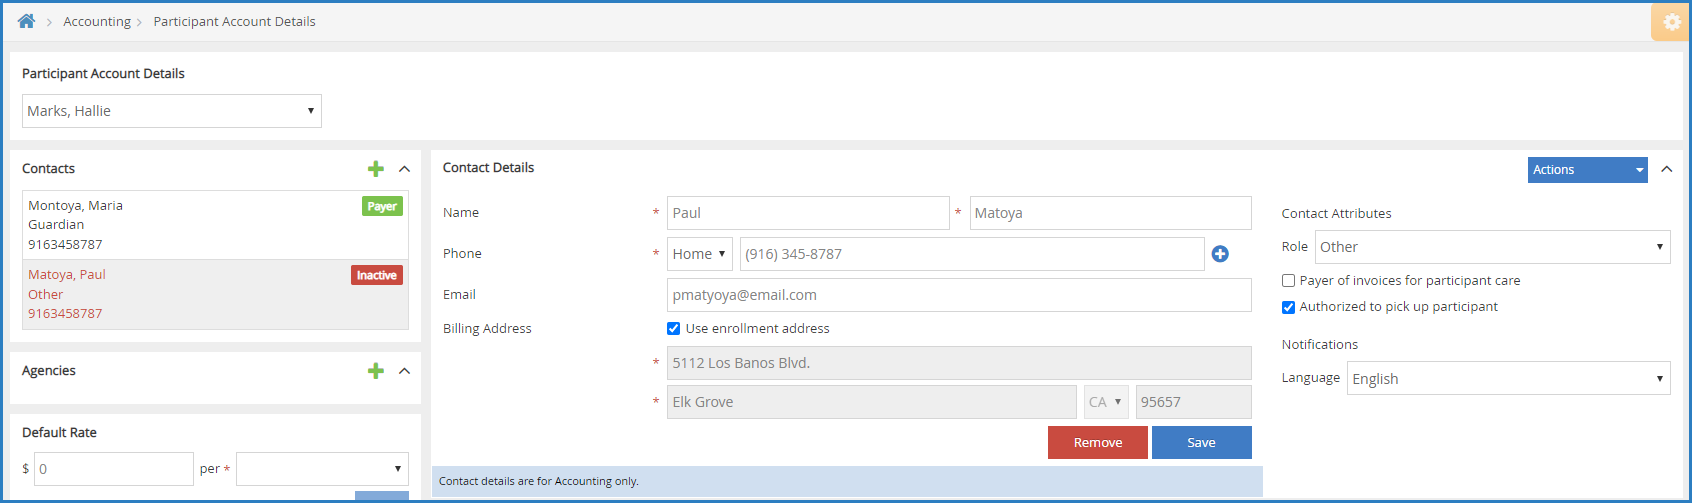
Set Contacts to Inactive
When you set a contact to inactive, it means they are no longer a payer on the participant account. This person is still a contact for the participant, but does not pay invoices.
- From the menu to the left, click Accounting.
- Click Accounts. The Participant Account Details page opens. The Participant Account Details page opens and displays information for the last participant you viewed.
- Click the drop-down menu at the top of the page and select the participant for whom to manage contacts.
- From the Contacts section to the left, click the contact to change. The Contact Details section displays the current information for this contact.
Note: If this section does not display, click
 to expand it.
 - In the Contact Attributes section, clear the Payer Invoices for Participant Care box.
- When finished, click Save. The contact is set to inactive status.

Remove a Contact
To remove an contact from a participant account:
- From the menu to the left, click Accounting.
- Click Accounts. The Participant Account Details page opens and displays information for the last participant you viewed.
- Click the drop-down menu at the top of the page and select the participant for whom to remove a contact.
- In the Contacts section, select the agency to remove. Their information displays in the Contact Details section.
- Click Remove.
- At the Are You Sure prompt, click Yes. The contact is removed.