
This article covers receipt entry and verification. The steps to add receipts are the same as those your centers use to enter their receipts. Use the table of contents below to jump to the appropriate section.
Add Receipts: Itemized Entry
When you use itemized entry to add expenses, you enter each item on the receipt in detail. Itemized entries include the item category, amount, quantity, total cost, and an optional description.
- From the menu to the left, click Administration.
- Select Manage Verify Receipts.
- Click the Select Center drop-down menu at the top of the window and select the center with which to work.
- Click Add Receipt. The Add Receipts page opens.
- Click the Itemized Entry tab.
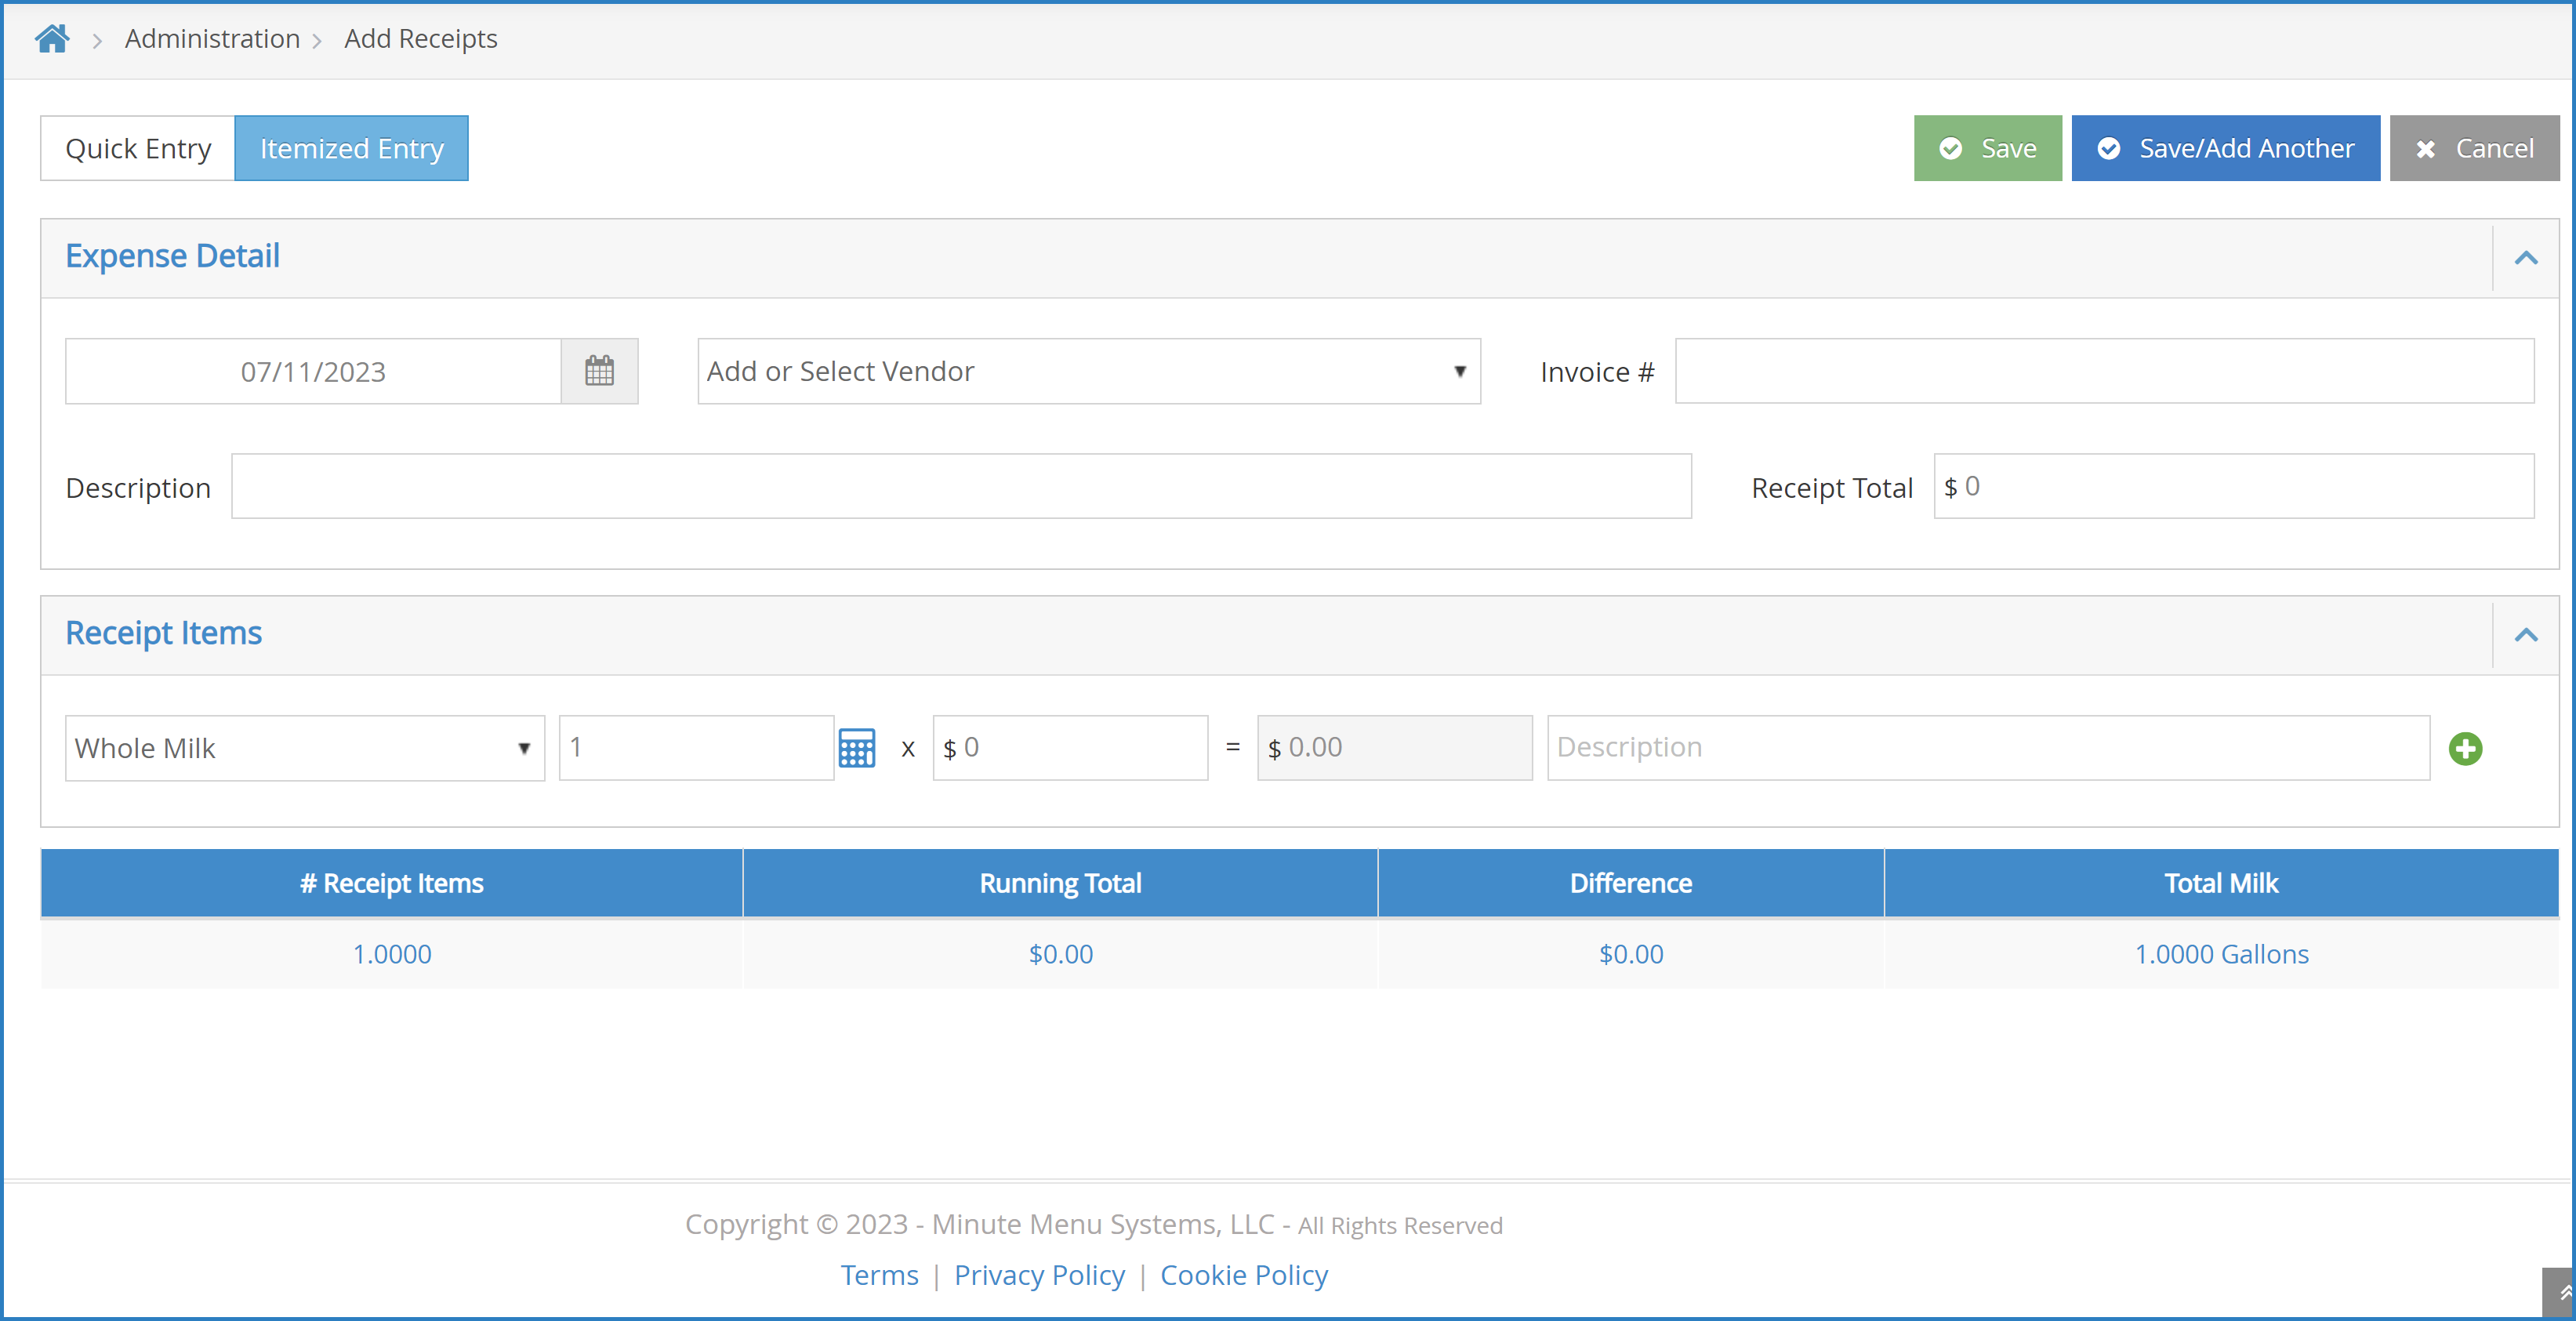
- Complete the Expense Detail section.
- The Date, Vendor, and Receipt Total boxes are required.
- We recommend you also enter a Description for reporting purposes.
- Complete the Receipt Details section.
- Click the Select a Category drop-down menu and select the expense category. All expense categories except Unapproved count towards reimbursement for the food program.
- Enter the item quantity. You can enter up to four (4) decimal places. This box defaults to 1.
- If you selected a Milk category, you can use the Gallons Converter.
- Click
 or type + (plus sign) in the quantity box.

- Enter the number of pints, quarts, half-gallons, and/or ounces of milk you purchased.
- Click Save.
- Click
- If you selected a Milk category, you can use the Gallons Converter.
- Click the $ box and enter the item's unit price. The system automatically multiplies the unit price by the quantity and provides a total. You cannot change the calculated total.
- Click the Description box and enter a description for this line item. You can enter up to 255 characters. This box is optional.
- Click
 to add another line.
- Click Save in the top-right corner. You can also click Save/Add Another to save your entry and begin adding another one.


Note: You cannot save your entry if the receipt and running total do not match. The receipt and running total must also both be greater than zero. You must also complete all required fields before saving.
Add Receipts: Quick Entry
When you use Quick Entry to add expenses, you enter receipt items into category fields by dollar amount. The category fields calculate the total for the category by taking the sum of all numbers entered for the category. The running total is then compared to the receipt total.
- From the menu to the left, click Administration.
- Select Manage Verify Receipts.
- Click the Select Center drop-down menu at the top of the window and select the center with which to work.
- Click Add Receipt. The Add Receipts page opens.
- Click the Quick Entry tab.
- Complete the Expense Detail section.
- The Date, Vendor, and Receipt Total boxes are required.
- We recommend you also enter a Description for reporting purposes.
- Enter your milk quantities in gallons. You can also use the Gallons Converter:
- Click the Gal link next to the milk type, or type + (plus sign) in the milk quantity box.

- Enter the number of pints, quarts, half-gallons, and/or ounces of milk you purchased.
- Click Save.
- Click the Gal link next to the milk type, or type + (plus sign) in the milk quantity box.
- Enter your expenses in the Expenses Items section.
- Click the box next to the category to record, and enter the dollar amount. All expense categories except Unapproved count towards reimbursement for the food program.
- Press Tab to enter multiple, separate dollar amounts in each category.
- Click X next to a dollar amount to remove it.
- Type / (forward slash) in a box to populate it with the remaining difference.
- Click Save in the top-right corner. You can also click Save/Add Another to save your entry and begin adding another one.

Note: You cannot save your entry if the receipt and running total do not match. The receipt and running total must also both be greater than zero. You must also complete all required fields before saving.
Verify Receipts
Verifying receipts allows you to track which sites have sent you receipts and confirm the data is correct. Even though this step is optional, we recommend you complete it if you allow sites to enter their own receipts.
- From the menu to the left, click Administration.
- Click Manage Verify Receipts. The Manage Verify Receipts page opens.
- Use the drop-down menu and select a date range to view. You can choose from the following:
- Last 90 Days
- Last 60 Days
- Last 30 Days
- Current Month
- Previous Month
- Custom Date
- Click the link in the Date column to view the receipt details. The Edit Expense pop-up opens.
- Make any changes, as needed. When finished, click Save.
- Click Verify.
Notes: You can click Verify All from the Manage Verify Receipts page to verify all receipts listed for the selected center for the selected date range. Also, to remove receipts you cannot verify, access the Edit Expense pop-up and click Delete. Deleting receipts is permanent.