
If your provider is registered to accept online payments through Parachute, the Settings page will have an additional tab for Payment Information & Auto Pay. This is where you can add payment methods.
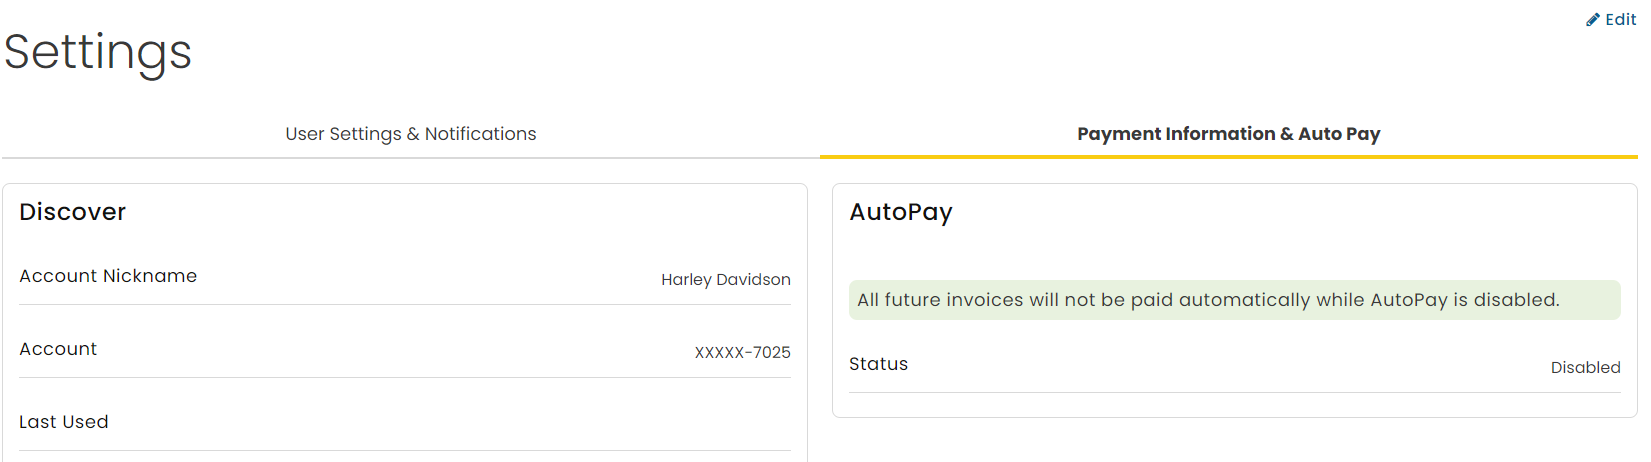
- From the menu to the left, click Settings.
- The settings page opens, click the Payment Information & Auto Pay tab.
- Click
 in the top right corner to add, update, remove any payment information.
 - Click
 once updated have been made.
 in the top right corner to add, update, remove any payment information.
  once updated have been made.
Add & Manage Credit Cards
Adding credit cards to Parachute allows you to use cards for one-time or recurring invoice payments.
- From the Payment Information & Auto Pay tab, click

- Select
 . The Payment Method box pops up.
 - Enter all required fields:
- Enter your Card Number exactly as it appears on the card.
- Enter the expiration month and year for the card in MM/YY format.
- Click the CVC box and enter the CVC for your card. You can find this three-digit code on the back of most major credit cards. If this is an American Express card, the CVC is the four-digit number on the front of the card.
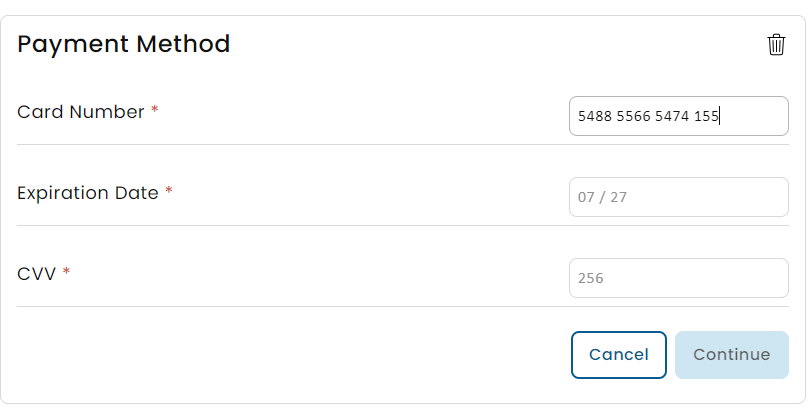
- Click Continue and the card will be verified. You will receive an error if the card information was entered incorrectly.
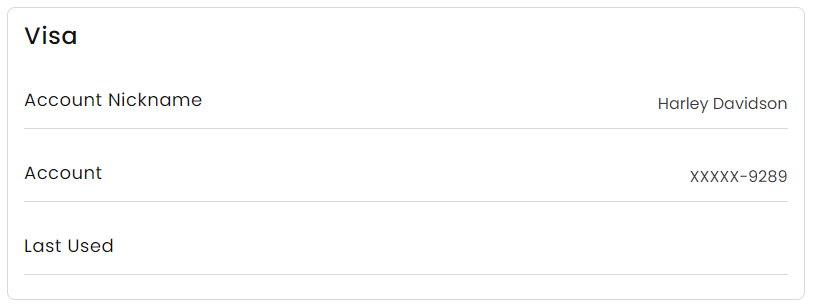
- Once the card is verified, it shows in the payment list.
- Click
 in the upper right hand corner.

 . The Payment Method box pops up.

 in the upper right hand corner.
Delete a Credit Card
To delete a credit card:
- In the Payment Information & AutoPay section within Settings, click the
 button in the upper right and corner, then find the card you would like to remove.
 - Click the
 icon. This will permanently remove this bank account, unless you add it back manually.
 button in the upper right and corner, then find the card you would like to remove.
 icon. This will permanently remove this bank account, unless you add it back manually.
 Add & Manage Bank Accounts
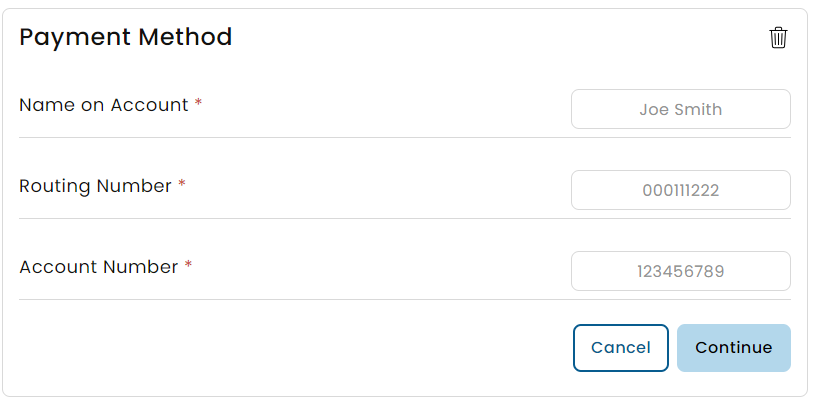
Adding a bank account to Parachute allows you to set up one-time or recurring ACH payments. This authorizes your bank to quickly send money from your account to pay your invoices, eliminating the need for paper checks and cash payments. This payment method is referred to as an ACH payment. Paying your invoices with ACH can save you money, as the processing fees charged for this method of payment are typically less than the ones charged for using a credit/debit card.
When you add a bank account, Stripe, the service that processes online payments, will make two small deposits into your account. You have to enter these amounts to verify your bank account. Ensure that all information you enter is accurate.
- Go to Settings.
- Select the Payment Information & Auto Pay tab and click Edit in the upper right hand corner
- Click
- Select
 . The Payment Method box pops up.
 - Enter all required fields:
- Your full name as it appears on your bank account.
- Enter the Routing Number for your bank account.
- Enter the Account Number.
- Click Continue. The Pending Verification message displays. Your bank account is at Pending status until you receive the two small deposits from Stripe. Once you receive these deposits, continue to the Verify a Bank Account heading, below.
- Click
 in the upper right hand corner.
 . The Payment Method box pops up.
 in the upper right hand corner.
Verify a Bank Account
Once you receive two small deposits from Stripe, return to the Settings page to verify your pending bank account.
- Go to Settings
- Select the Payment Information & Auto Pay tab.
- Click on the Edit button located at the top right corner.
- Choose the bank account listed on the left to bring up the verification prompt.
- Click the Deposit 1 and Deposit 2 boxes and enter the deposit amounts as shown in your bank transaction log. For example, if the deposits were $0.12 and $0.05, input 12 in the first box and 5 in the second box.
- Click Verify Account. If the amounts entered match what is shown on your bank account, the Success message displays and you can now use your bank account to pay invoices.
Delete a Bank Account
To remove bank accounts you are no longer using:
- In the Payment Information & AutoPay section within Settings, click the Edit button in the upper right and corner, then find bank account you would like to remove
- Click
 icon. This will permanently remove this bank account, unless you add it back manually.
 icon. This will permanently remove this bank account, unless you add it back manually.
 Setup & Manage AutoPay
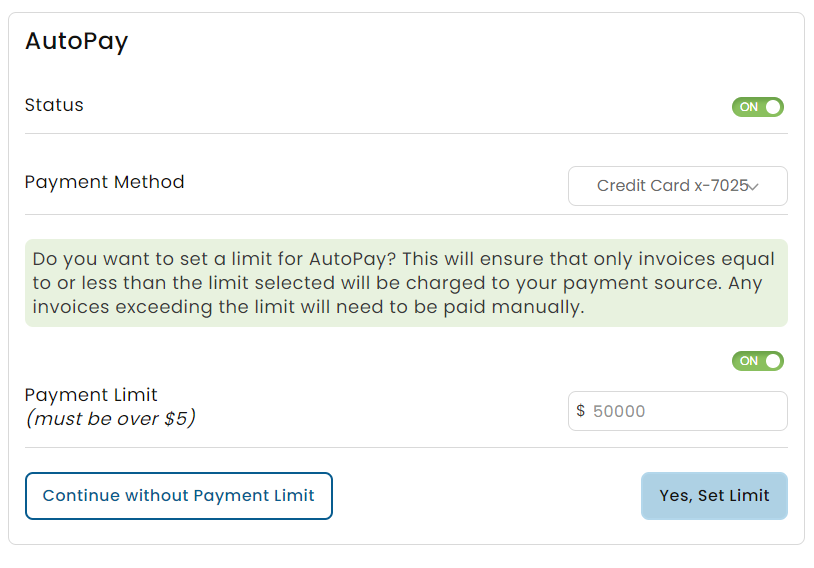
When you set up AutoPay, payments are made automatically from the bank account or credit card you designate. You can also set payment limits that ensure that only invoices equal to or less than the selected limit are charged to your payment method. Any invoices exceeding this limit must be paid manually.
Note: You can only have one payment method active for AutoPay at a time.
Enable AutoPay
- From the Payment Information & AutoPay tab within Settings, click the
 button in the upper right corner.
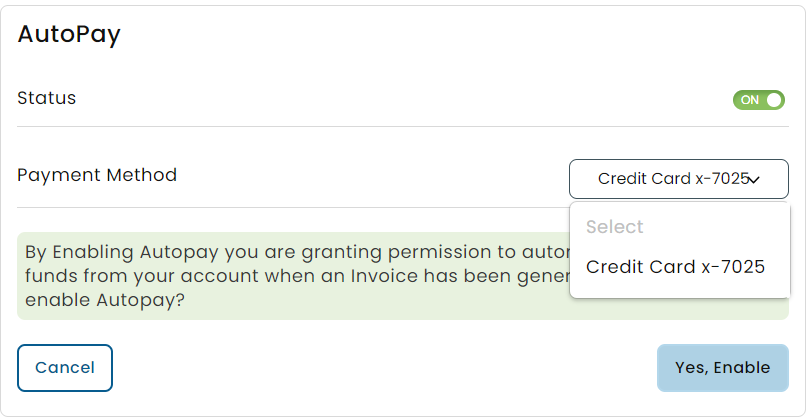
 - Turn the AutoPay status from Off to On.
- From the Payment Method drop down, select the desired payment method.
- Click Yes, Enable.
- If you wish to set a Payment limit enter in the amount, then click Yes, Set Limit.
- If you don't wish to set a limit at this time click Continue without Payment Limit.
- Click
 in the upper right hand corner.
 button in the upper right corner.


Disable AutoPay
- In the Payment Information & AutoPay section within Settings, click the Edit button in the upper right and corner
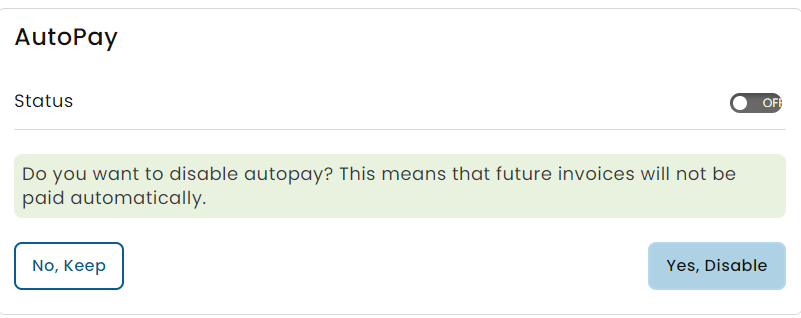
- Turn the AutoPay status from on to Off.
- Click Yes, Disable.
- Click
 in the upper right hand corner.

