
If you did not complete a review with the online Review Tool and need to input data recorded on paper, you can do so via the Add Manual Review feature in KidKare.
- From the menu to the left, click Tools.
- Select List Reviews.
- In the Find Records section, choose the Selected Center option to view and add reviews for the center selected at the top of the window, or choose All Centers to include all centers in the filtered list.
- Click Add Manual Review. The Add/Edit Review page opens.
- In the Current Review Details section:
- Click the Review Type drop-down menu and select the type of review you are conducting. For example, if this is the first time you are reviewing this center, you would select 1st Review.
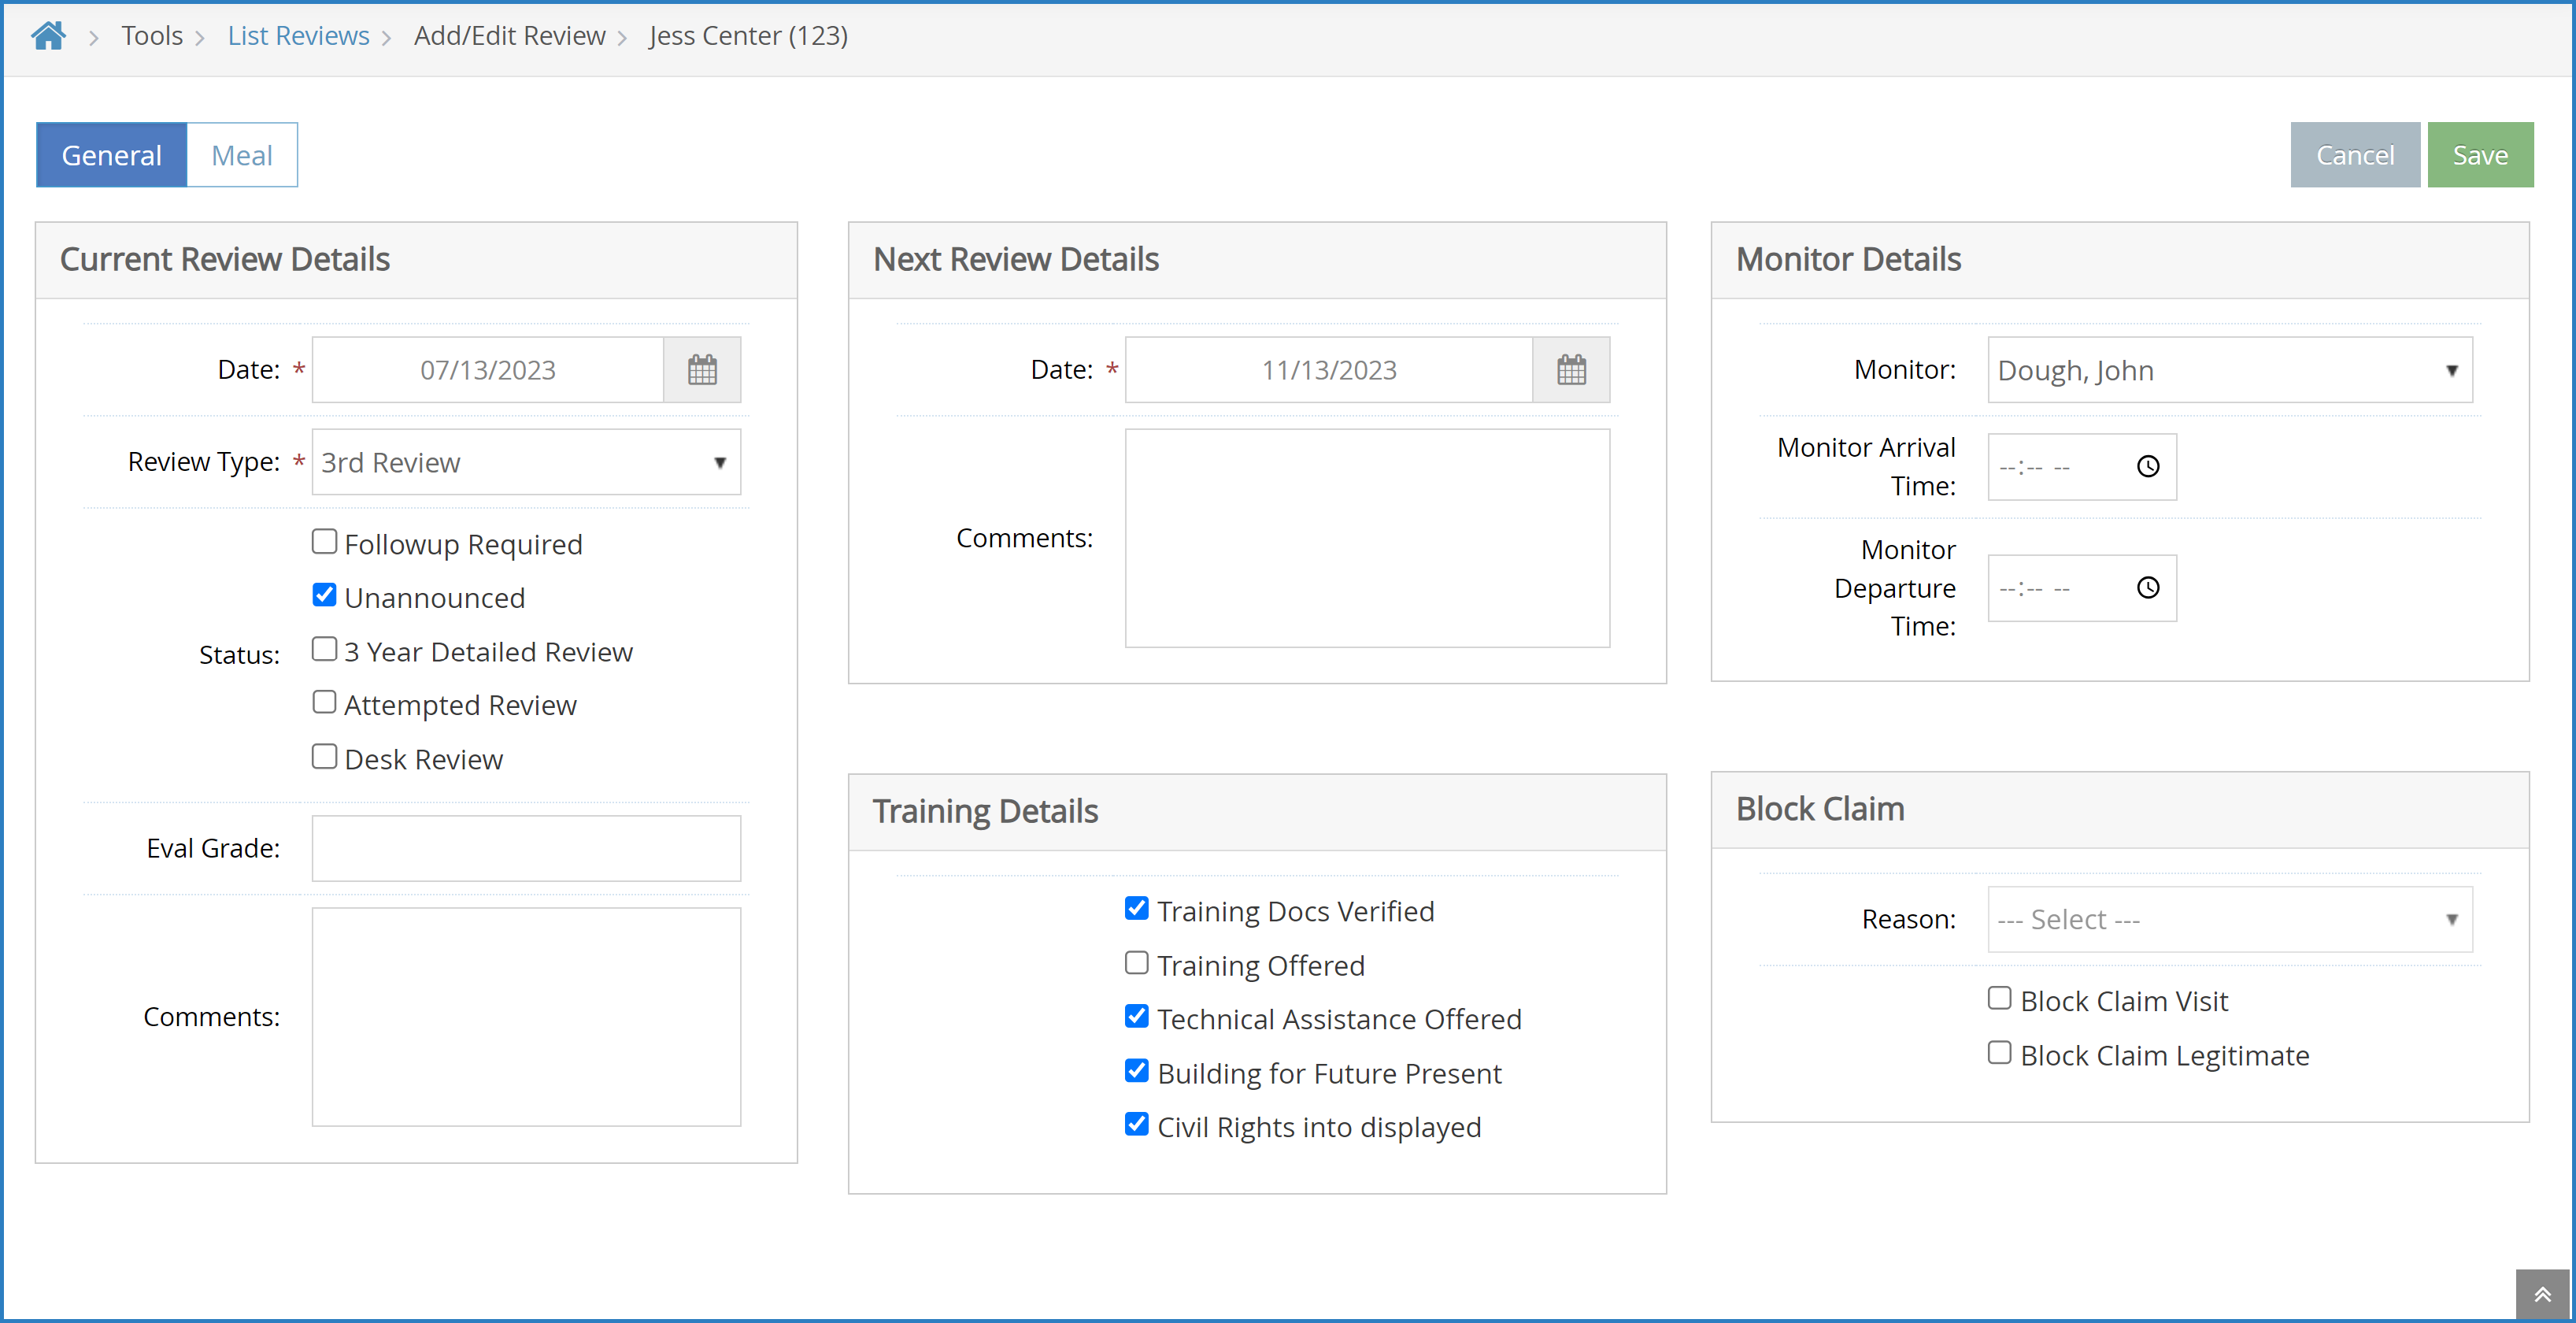
- Check any of the following boxes that apply to this review:
- Followup Required
- Unnaounced
- 3 Year Detailed Review
- Attempted Review
- Desk Review
- Click the Eval Grade box and enter the review grade.
- Click the Comments box and enter any comments about the current review.
- Click the Review Type drop-down menu and select the type of review you are conducting. For example, if this is the first time you are reviewing this center, you would select 1st Review.
- In the Next Review Details section, Click the Date box and select the date for the next review. Enter any applicable commentary in the Comments box.
- In the Training section, check the box next to each item that applies.
- In the Monitor Details section:
- Click the Monitor drop-down menu and select the monitor who completed the review.
- Click the Monitor Arrival Time and Monitor Departure Time boxes and enter the time the monitor arrived at the center and the time they departed from the center.
- In the Block Claim section, indicate whether this was a review for block claims.
- Click the Meal tab.
- In the Meal Service Details section:
- Select the meal you observed. If you did not observe a meal at this review, accept the default of No Meal and continue to Step 12.
- Select the meal components you observed for both Non-Infants and Infants.
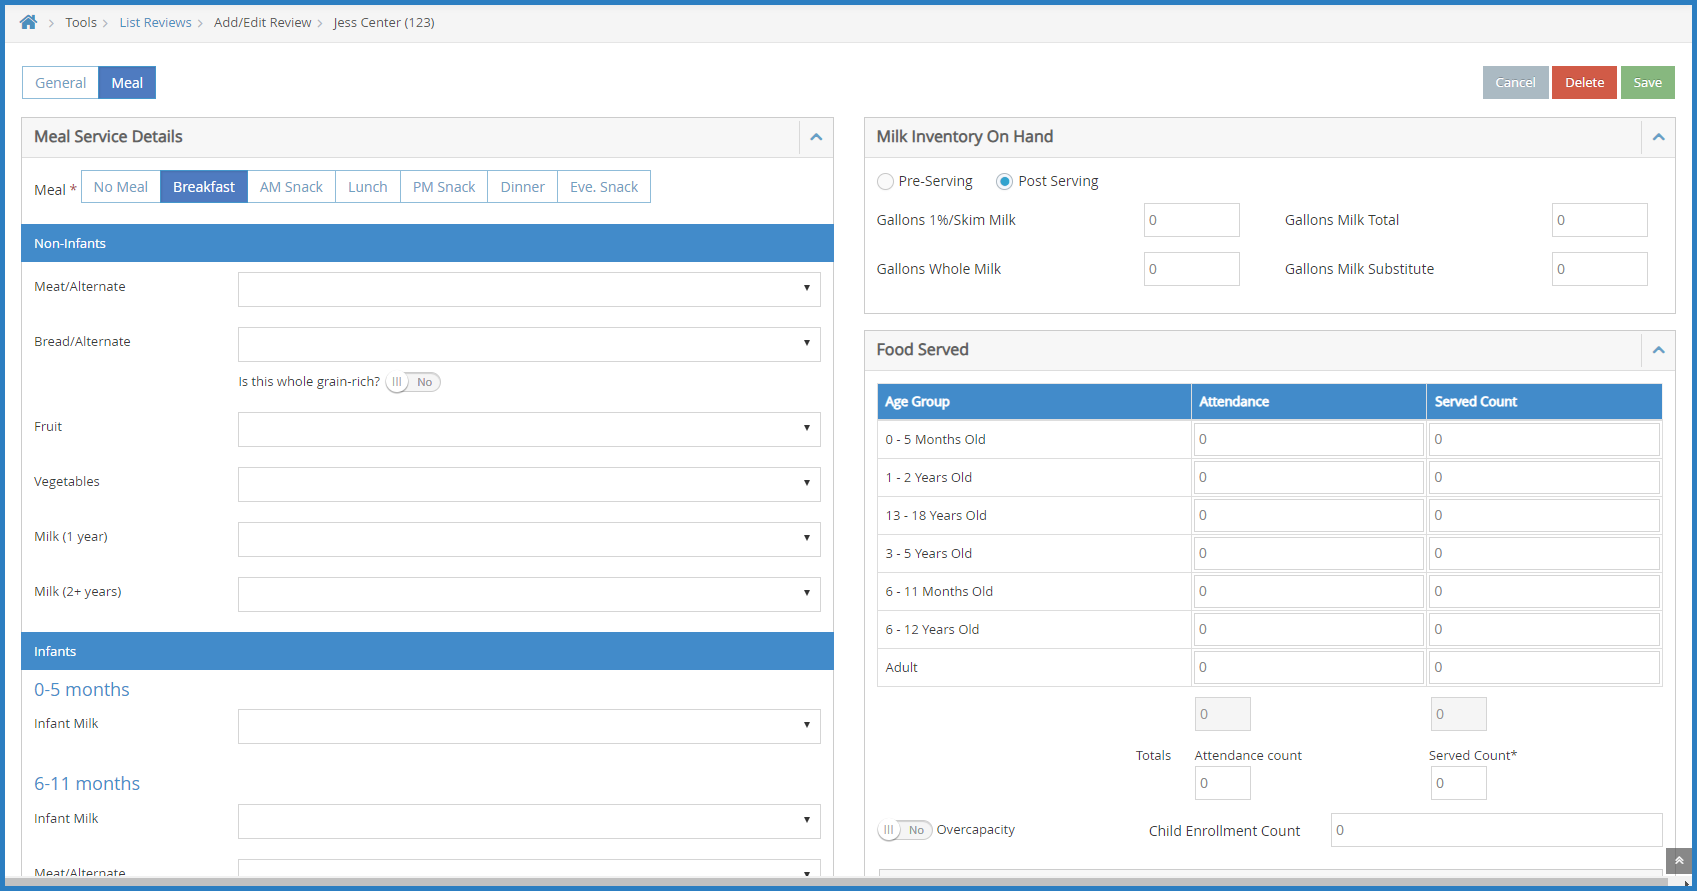
- In the Milk Inventory On Hand section:
- Select the Pre-Serving option or the Post Serving option.
- Enter milk totals.
- In the Food Served section:
- Record attendance by classroom, age group, or center total. The method you use is subject to Policy R.4
Note: You can skip entering counts in the table and enter totals directly below the table if totals are all you need. The total served count will be compared to the meal counts recorded by the center for that meal on that day (subject to Policy R.2).
- If the center was overcapacity, click
 next to Overcapacity.
 - Click the Child Enrollment count box and enter the total number of children enrolled.
- Click the Special Note box and enter any notes.
- Record attendance by classroom, age group, or center total. The method you use is subject to Policy R.4
- If you have disallowances, click Disallow Specific Meals for Specific Children. If you do not have disallowances, go to Step 9.
Note: Only use the Disallow tab if meals need to be disallowed as a result of the monitor visit.
- In the Disallow pop-up:
- Check the box for each meal to disallow.
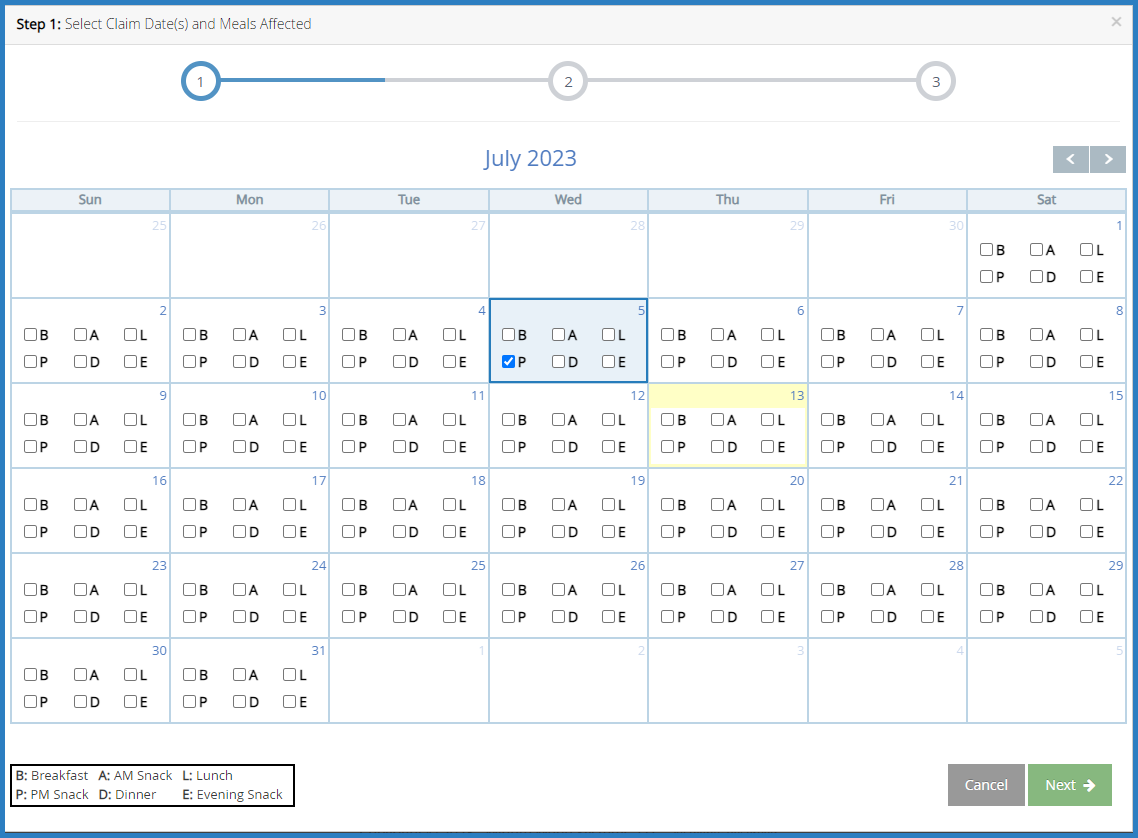
- Click Next.
- Click the Children Affected drop-down menu and select the age group affected by this disallowance.
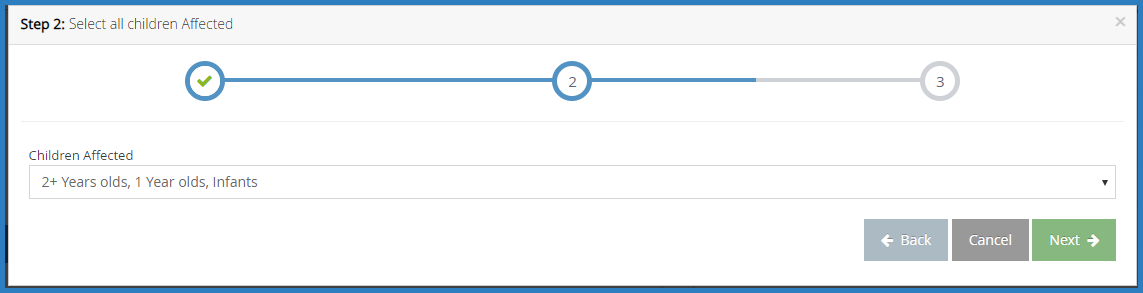
- Click Next.
- Click the Disallow Reason drop-down menu and select the reason you are disallowing this menu.
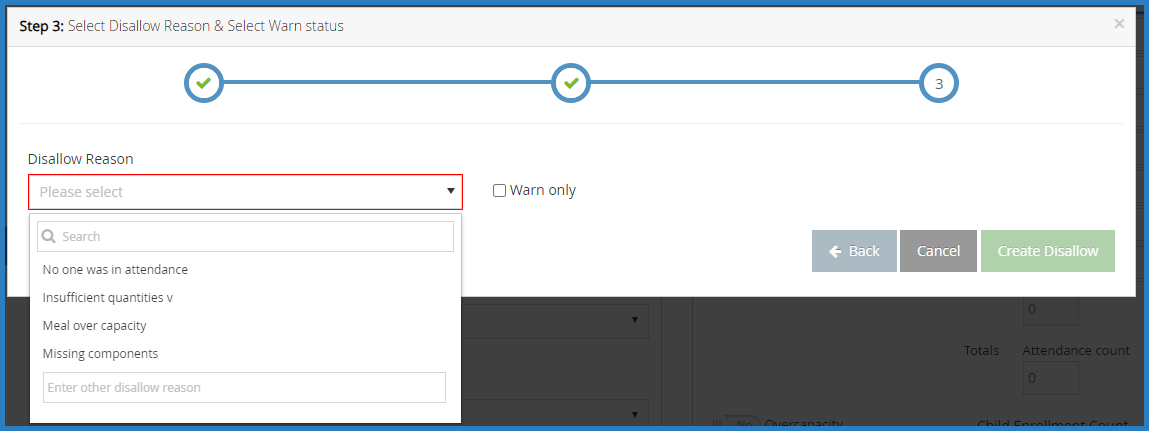
- Check the Warn Only box to log this as a warning instead of a disallowance.
- Click Create Disallow.
- Check the box for each meal to disallow.
- Click Save.


 next to Overcapacity.

