
Use the Vendors page to manage the vendors assigned to your expenses. This lets you quickly select a specific vendor when entering expenses in both Itemized Entry and Quick Entry.
Required Permissions: You must have the Vendor/Receipts permission enabled on your account to access and work with the Vendors page.
Add Vendors
- From the menu to the left, click Expenses.
- Click Manage Vendors. The Vendors page opens.
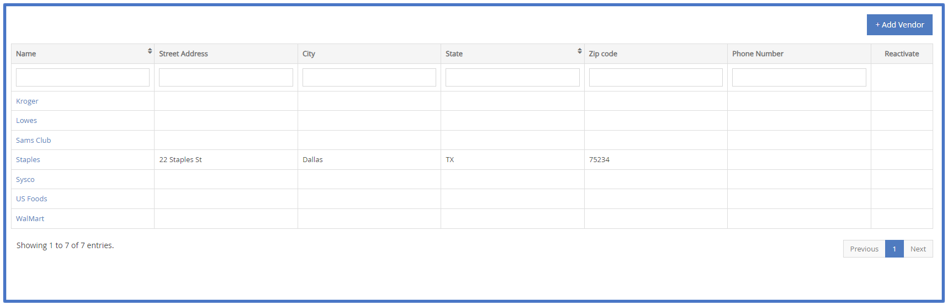
- Click Add Vendor. The Add Vendor pop-up opens.
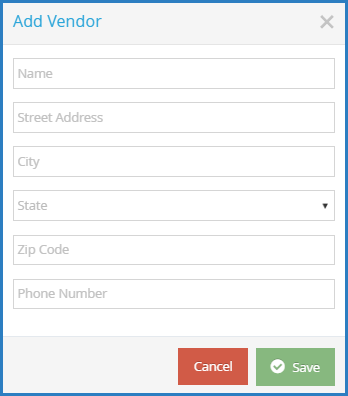
- Click the Name box and enter the vendor's name. This box is required.
- Enter the vendor's street address, city, state, zip code, and phone number, if needed.
- Click Save. The vendor is added to the table.


Note: You an also access the Add Vendor pop-up from the Add Expense page. When adding an itemized entry or a quick entry, click the Vendor drop-down menu and select Add Vendor. The Add Vendor pop-up opens.
Edit Vendors
- On the Vendors page, click the name of the vendor to change. the Edit Vendor pop-up opens.
- Enter new information over the existing information.
- Click Save.
Delete Vendors
- On the Vendors page, click the name of the vendor to change. the Edit Vendor pop-up opens.
- Click Delete.
- To restore a deleted vendor, click Restore next to the vendor to restore. If you do not see your deleted vendors listed on the Vendors page, click Filters in the top-right corner and select Deleted.