
You can create invoices and send them automatically to payers. You can create both single invoices, as well as recurring invoices. In this article we will discuss how to create both.
Create A Single Invoice
Creating an Invoice through Parachute is simple! You can add as little or as much data to the invoice as you need and even add or edit data later. You can find information on how to edit an invoice here. There are now many different ways to create an invoice, do what works best for you! To create a new invoice:
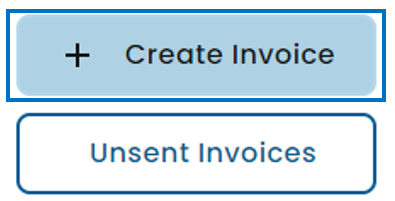
- From the menu to the left click Invoices.
- Select Invoices in the drop down options. The Invoice screen loads.
- Click Create Invoice in the top right corner.
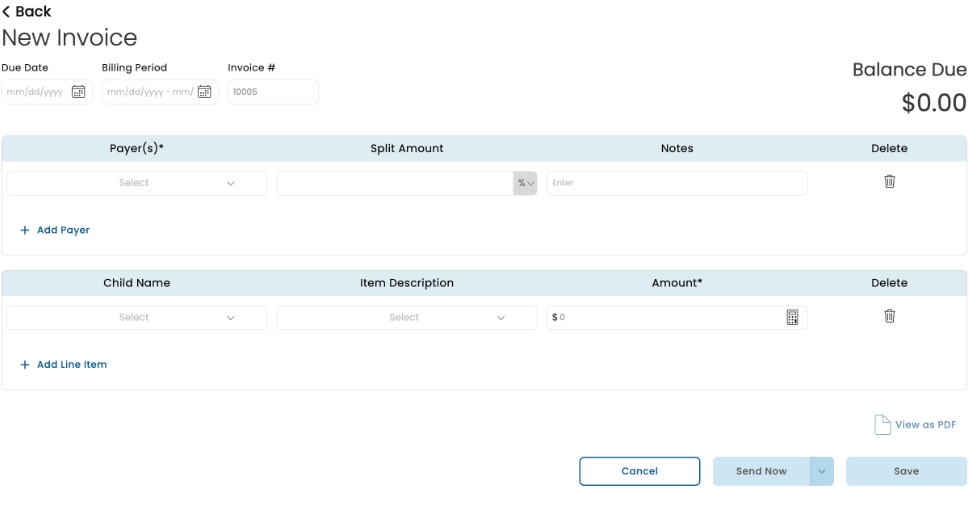
- The New Invoice page opens.
- Enter the invoice details into the invoice. Ensure all required fields marked with an
 are filled out.
 - Select the date the invoice will be sent.
- Choose Yes, Send Now to send the invoice now.
- To select a future date, click the
 next to Yes, Send Now to select the date the invoice will be sent.
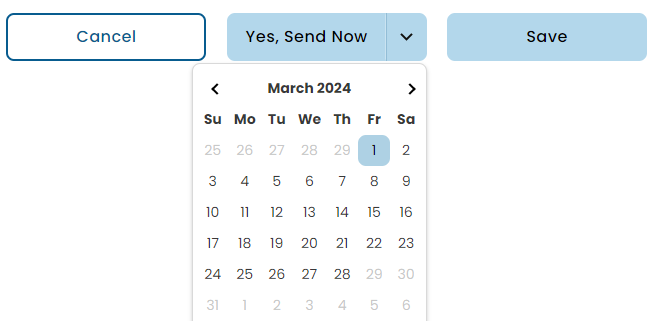
- Once you are finished updating the invoice click Save button.

 are filled out.
 next to Yes, Send Now to select the date the invoice will be sent.
Note: Parachute allows you to create an invoice for a Payer, even if they do not yet have a child associated with them. Use this to send invoices quickly and add data later or to take deposits for a child that has not yet been on-boarded.
Creating A Recurring Invoice
If you would like to create an Invoice that is sent on a regular cadence automatically you can do so with a Recurring Invoice. To create a recurring invoice from scratch:
- From the menu to the left, click Invoices.
- Select Recurring Invoices.
- Click the Create Recurring Invoice button on the upper right corner. A New Recurring Invoice page opens.

- Enter the invoice details into the invoice. Ensure all required fields marked with an are filled out. In addition to the fields required to generate a single invoice, to create a recurring invoice you also need to enter in the following:
- First Due Date: The date the first invoice should be charged.
- Billing Frequency: How often the Invoice should be sent.
- Additionally you may enter a Last Due Date. Once the Last Due Date passes the Recurring Invoice will be paused and no future invoices will be scheduled from this recurring invoice.
- Once the recurring invoice is filled out completely:
- Choose Yes, Send Now to send the invoice immediately.
- Choose Save to save the recurring invoice and it will send based on the Starting On date entered at the top of the invoice.

Note: You can also create a recurring invoice from any previously generated invoices. Find out more here
Invoice Field Definitions
There are multiple ways to fill-out an invoice depending on what data you want to include, how Payers and Children are associated, and how you want to calculate the total invoice balance. Below you will see how each field can be used. You are not required to fill-out invoice fields in any specific order, but some fields will be dependent on others.
 Indicates a required field
♦ Indicates a field that may be used to help calculate fees
- Due Date
- If you do not enter in a date then today's date will be auto-filled
- The date the invoice balance is due and must always be set as either the current date or for a date in the future
- If a Payer has AutoPay enabled then this is the date they will be charged
- Billing Period♦: This is the date range the invoice covers.
- Invoice Number: If you do not enter in a number here then one will be auto-populated for you when the Invoice is sent. You can set the Starting Invoice Number in Settings.
- Payer(s)*: This is who will receive the invoice and pay the invoice balance.
- When you select a Payer you can only add:
- Other associated Payers
- Other associated Children
- When you select a Payer you can only add:
Note: Only Payers and Children who are all associated with each other can be added to the same invoice. If you have multiple Payers who are associated with different children then you can only create an invoice for the children in common. Additional invoices will need to be created for Payers and Children who are not associated with each other.
- Split Amount(% or $)
- If multiple Payers are on one invoice then you must assign each a split amount.
- By default split amount is a percentage (%) but if you select the
 you can split by dollar amount ($)
- Split amount must equal 100% or the balance total between all payers selected.
- Notes
- Any additional information you want to provide to the Payer on the Invoice.
- If there are multiple Payers selected then the only notes they will see are those input on their line. If you would like to send the same note to all payers copy and paste it into each note section.
- Child Name♦: This field is used to show which fees are associated with either:
- A participant in your care.
- Item Only: This is used to indicate that a line item is not directly associated to a specific child.
- When you select a Child you can only add:
- Other associated Payers
- Other associated Children
- Item Description♦: This field indicates what the individual line item is for. You can select the following:
- Tuition: If this is selected for a child who has default Tuition/Fees data saved on their profile the amount field will be auto-populated based on their default settings and the Billing Period.
- Deposit
- Fees
- Voucher
- Custom Field: This allows you to add any custom line item descriptions you need to help you with your record keeping. (i.e. Field Trip Fees, Extra Meal Expense, Ice Cream Truck Fund, etc.)
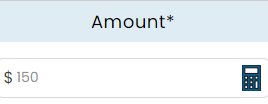
- Amount*♦
- This indicates the amount owed for each line item.
- Enter in the amount you want to charge or click the Calculator button to help you calculate the total.
- The Fee Calculator screen pops up.
- For Tuition, Deposits, and Vouchers you can edit the rate type, add discounts, and more.
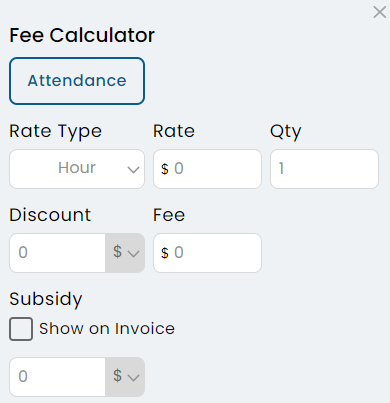
- Rate Type: The frequency in which the participant is billed.
- Rate: The dollar ($) amount charged per rate type.
- Qty: The number (#) of times you want to change that rate type.
- Attendance: Click this to calculate the hours of attendance recorded for the Child selected during the Billing Period selected, multiplied by the Hourly Rate stored in your Site Management settings.
- Discount (% or $): The amount entered here subtracts the amount from the Invoice Balance Total. By default Discount is a percentage (%) but if you select the
 you can discount by dollar amount ($). Dollar amount cannot exceed 100% of the Invoice Balance Total.
 - Subsidy (% or $):If a child is receiving subsidized care and you want to see this reflected on the invoice you can either:
- Check the box to Show on Invoice.
- If this box is checked then the Payer will see Subsidy called out on their invoice.
- If this box is unchecked then the Invoice Balance will reflect the Subsidy, but the Payer will not be able to see it called out on their invoice.
- By default Subsidy is a percentage (%) but if you select the
 you can enter a dollar amount ($). Dollar amount cannot exceed 100% of the Invoice Balance Total.
- Check the box to Show on Invoice.
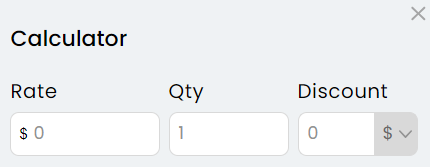
- When you choose Item Only, the calculator allows you to edit the quantity and add a discount.
- For Tuition, Deposits, and Vouchers you can edit the rate type, add discounts, and more.
- Trash Icon
 : Click this to remove an added Payer or Line Item from the invoice.
 - Use
 to add additional payers to the invoice.
 - Use
 to add additional line items to the invoice.


 : Click this to remove an added Payer or Line Item from the invoice.
 to add additional payers to the invoice.
 to add additional line items to the invoice.
Schedule Invoice for a Future Date
Once you are finished adding your invoice data you can either send the invoice immediately or schedule it to be sent out in the future.
- Send Now
- Click Yes, Send Now to send the Invoice to the Payers on the Invoice immediately.
- Click Save.
- Select the date to be sent
- Click the
 to see a calendar pop up. Select a future date for the invoice to be sent. From here you should see the Send button change to reflect the future date you selected.
- Invoices scheduled to be sent in the future can be found in the Unsent Invoices Section.
- Click Save.
- Click the

